
2. Data Model
In this step we will access the newly bootstrapped SolidX projects admin interface and start designing our data model.
Login
To Login to the SolidX admin panel visit the following URL - http://localhost:8081 this is where the SolidX admnin interface is running. You can use the default username & password generated when you ran solid seed
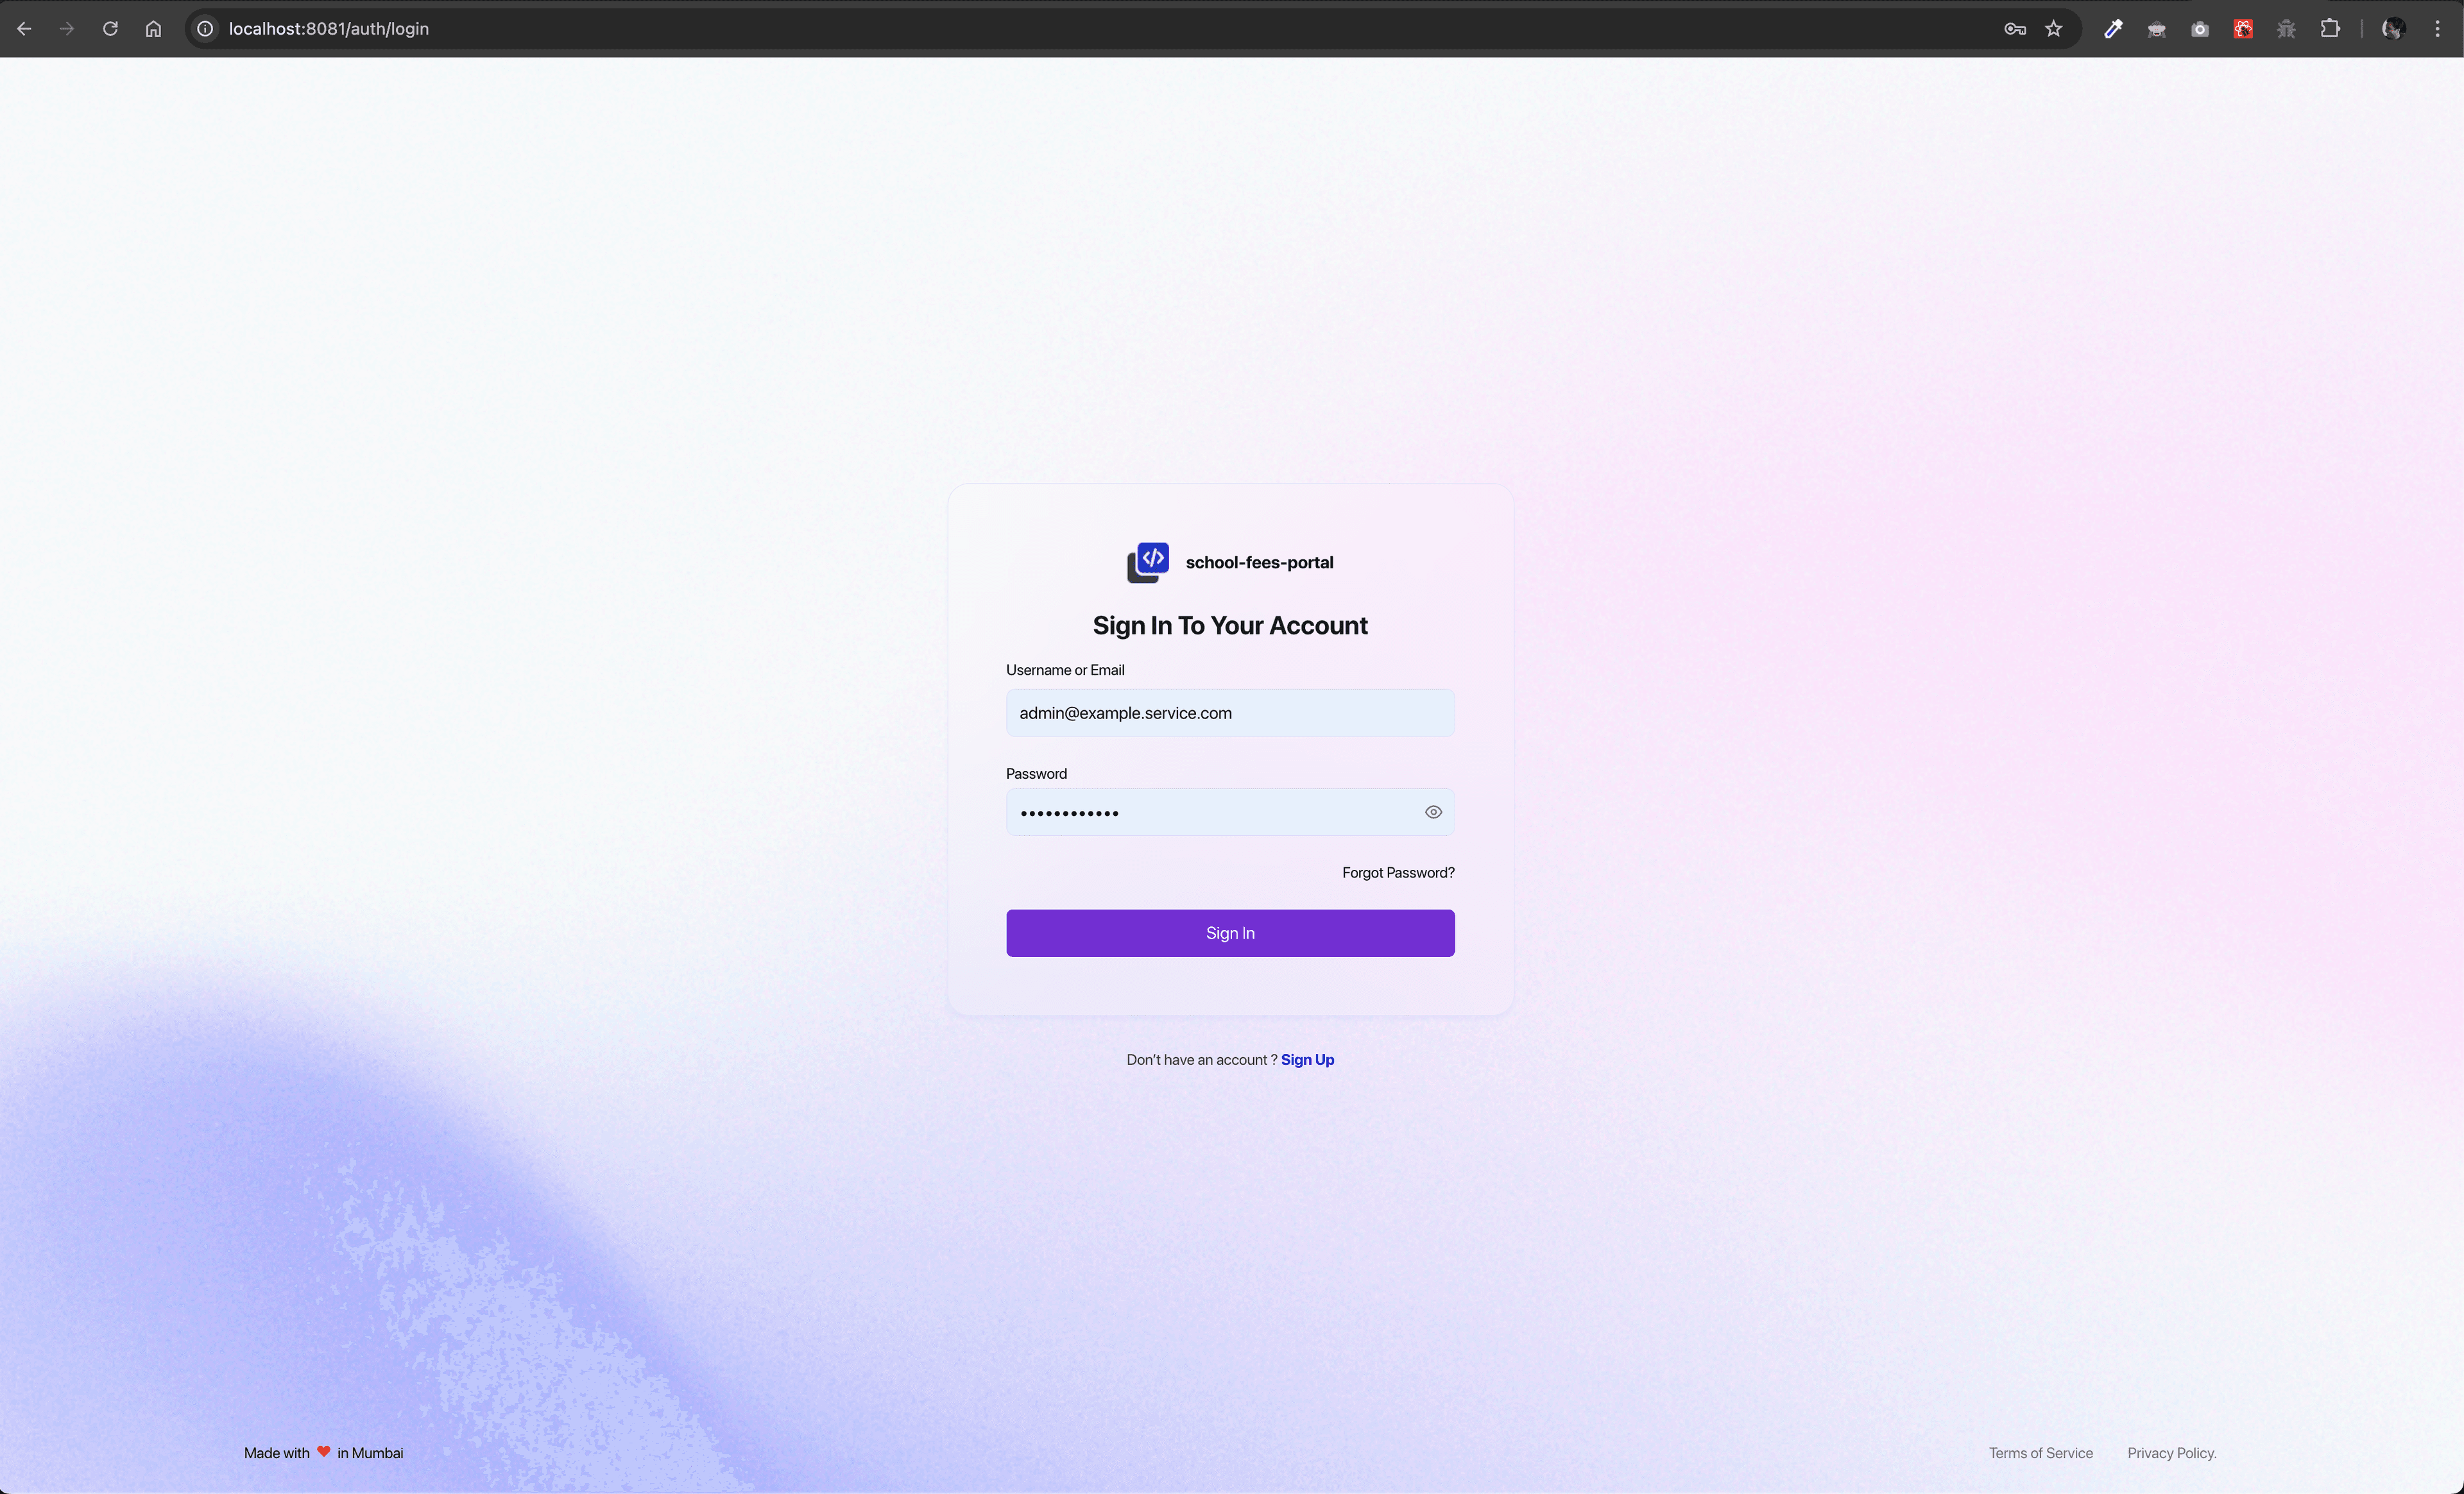
After logging in for the first time, SolidX will prompt you to change the password.
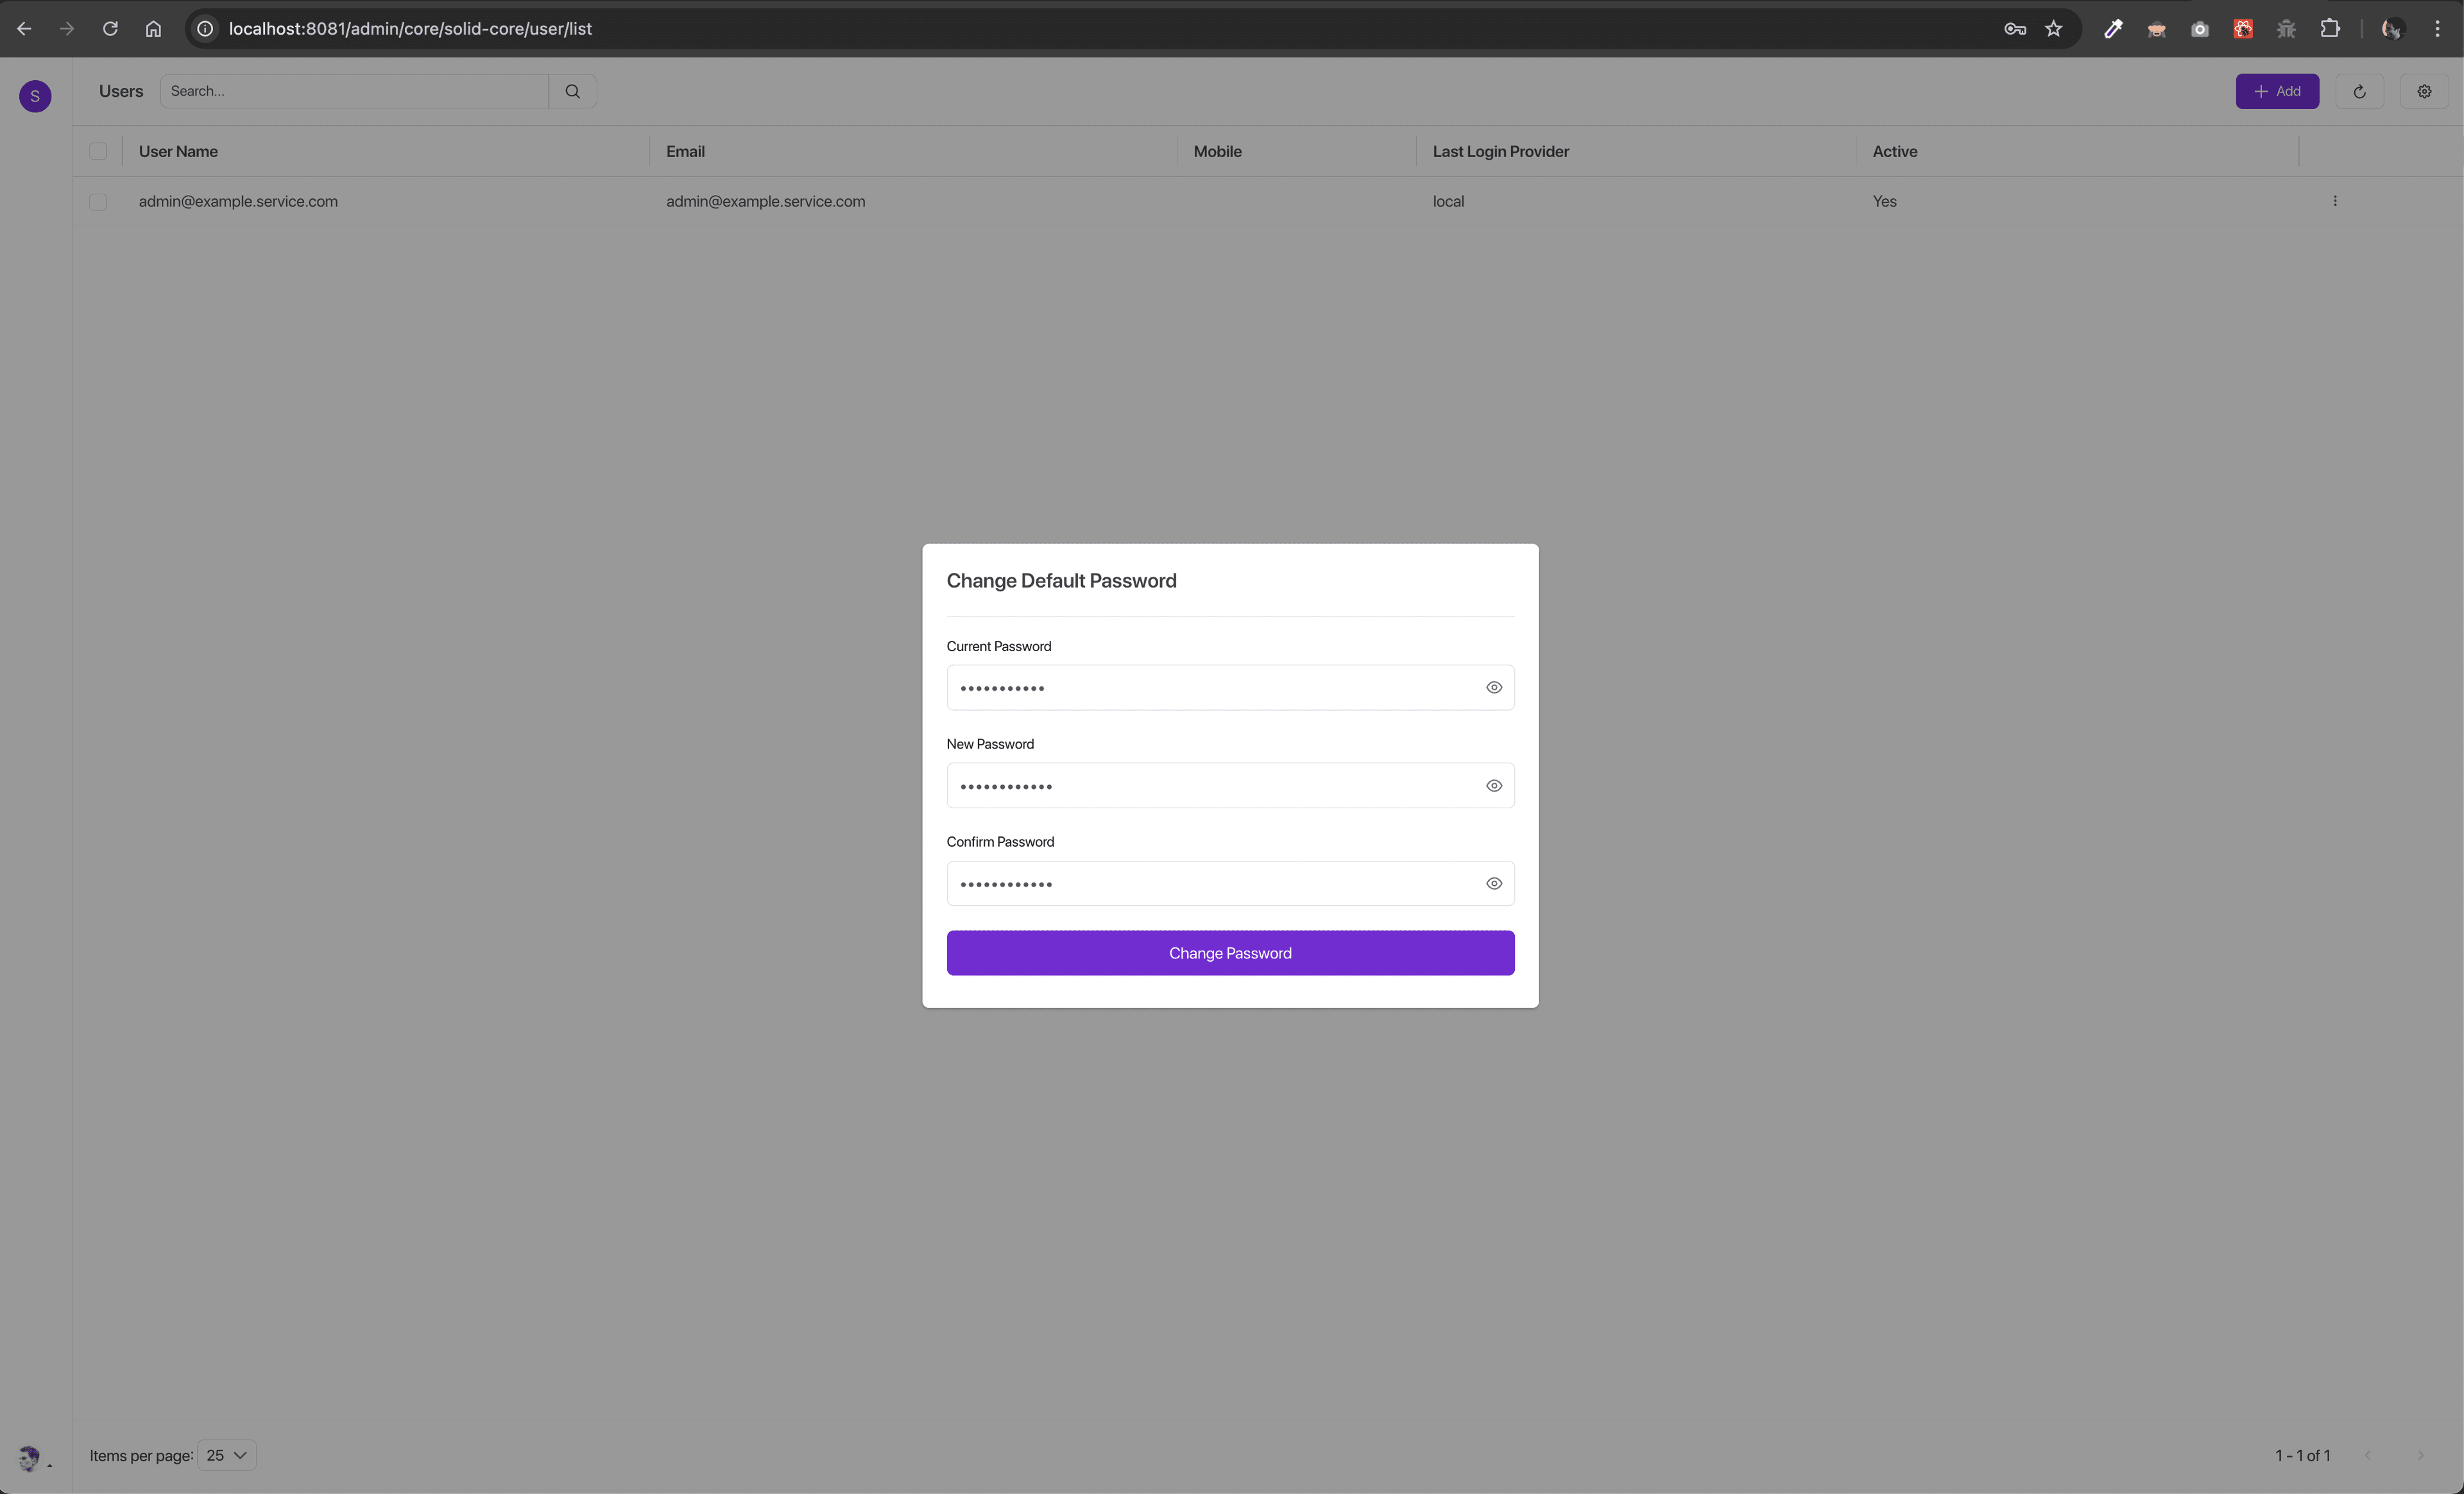
Once you have changed the password you will be able to access the SolidX backend. This defaults to the user list screen.
Module
Create Metadata
The first thing in any new SolidX application is to create a new module. We will start with creating a module to represent our school fee collection portal.
To do this go to Solid Core > App Builder > Module, then click on Add.
This will open up the new module form, you can fill in the details as they are mentioned in the below form. For now we have kept the module icon empty, SolidX will generate the icon in the main menu automatically.
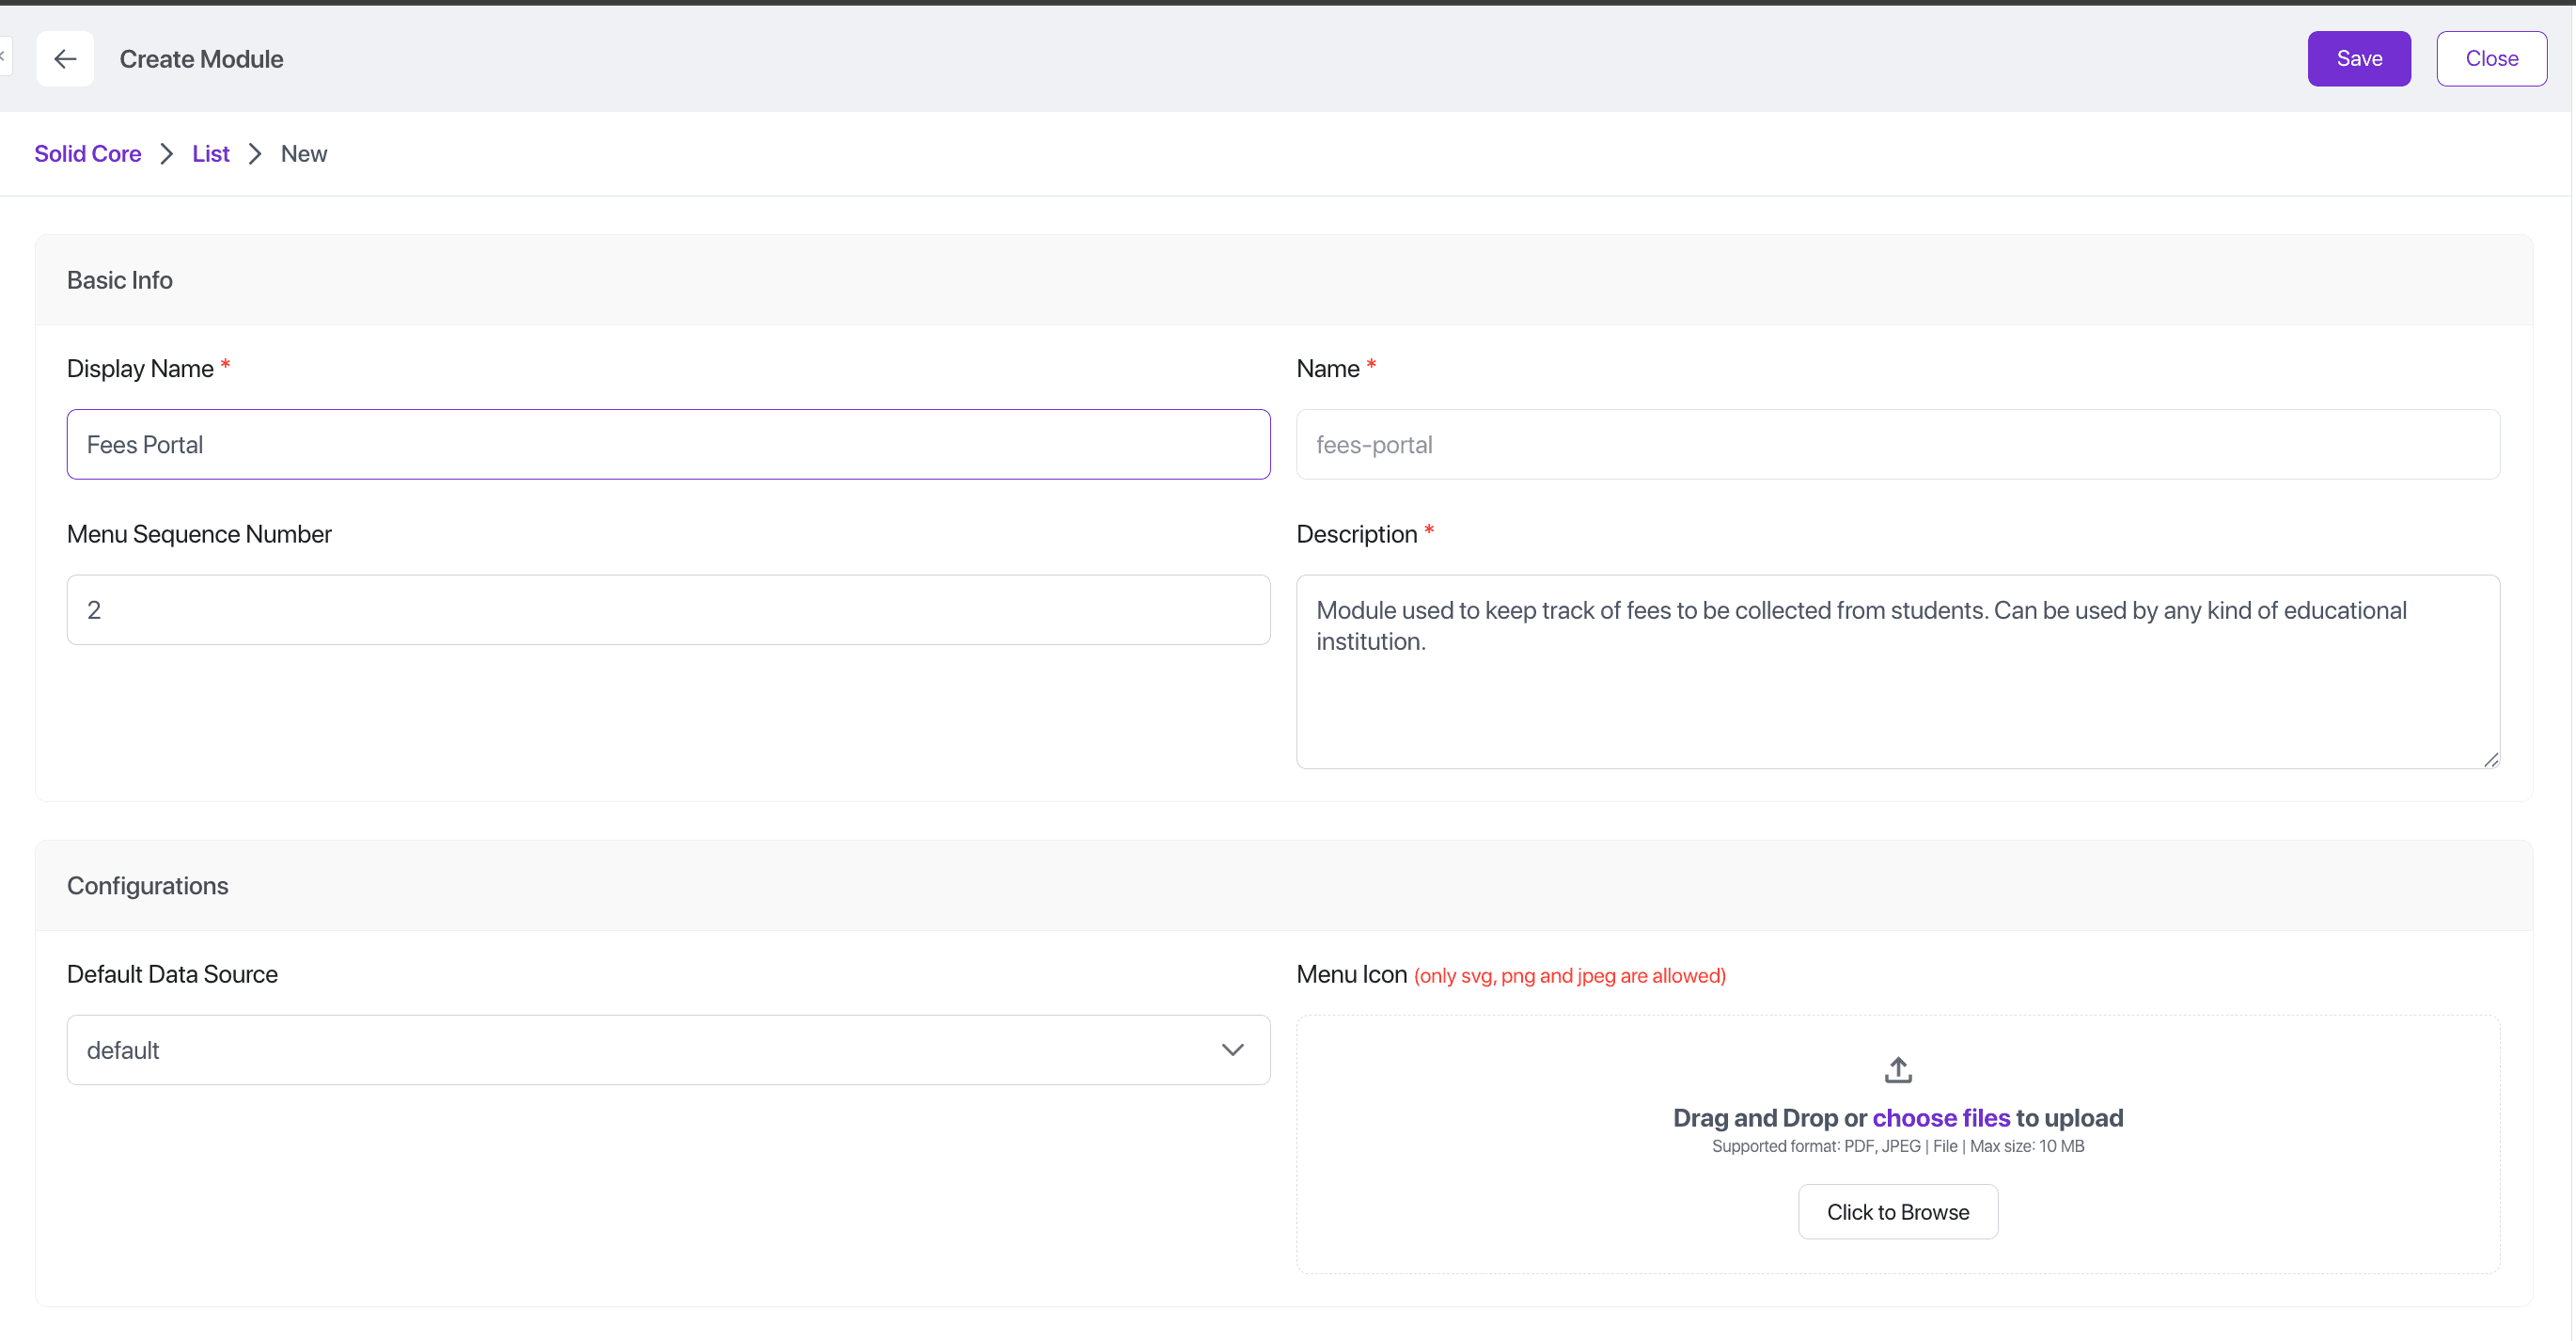
A note on the data source, when you created the project using the create-solid-app command, among the other files which were bootstrappted SolidX also created a default data source which is connected to the database whose details we specified during the creation process. SolidX does not restrict you to a single data source and you can configure multiple data sources, more on this in this Multiple Datasources.
Finally we can now go to the list view
Generate Code
The above step of creating a new module simply creates an entry in the ss_module_metadata table. Using this metadata now SolidX is able to generate the boilerplate required to house a module. To do this simply click on the "Generate Code" action under the context menu that opens up against each row. You will have to select this action against the row representing the newly added module.

This opens a confirmation dialog
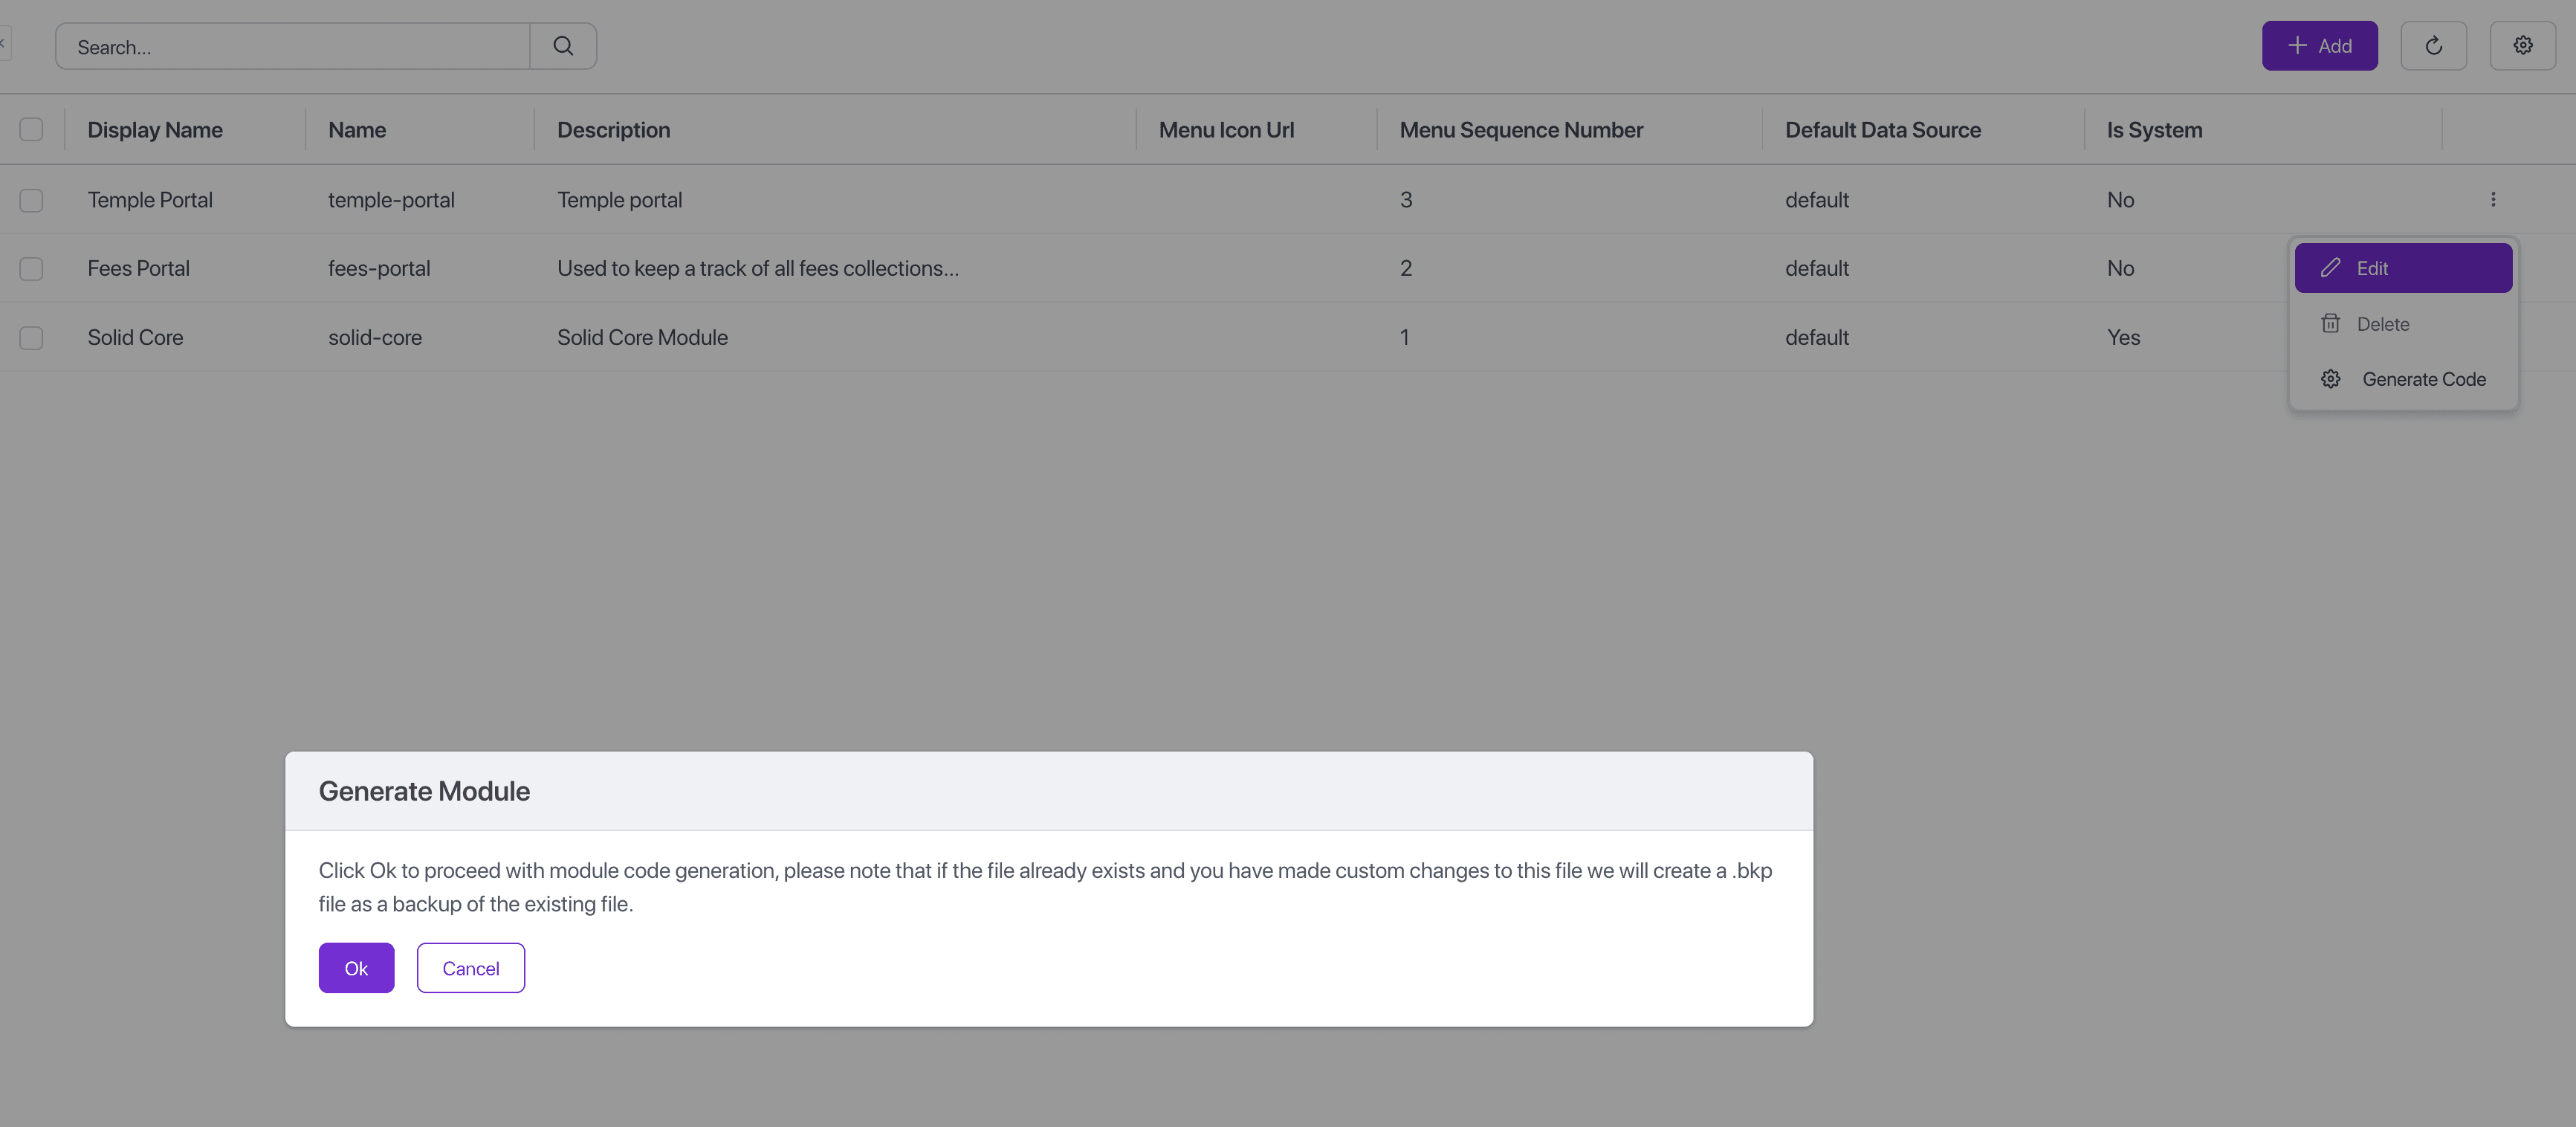
After you click "Ok" SolidX backend will generate the necessary code to support this module and after page refresh you will be able to see the newly created module in the menu. You will also see a default "home" page created for the newly created module.
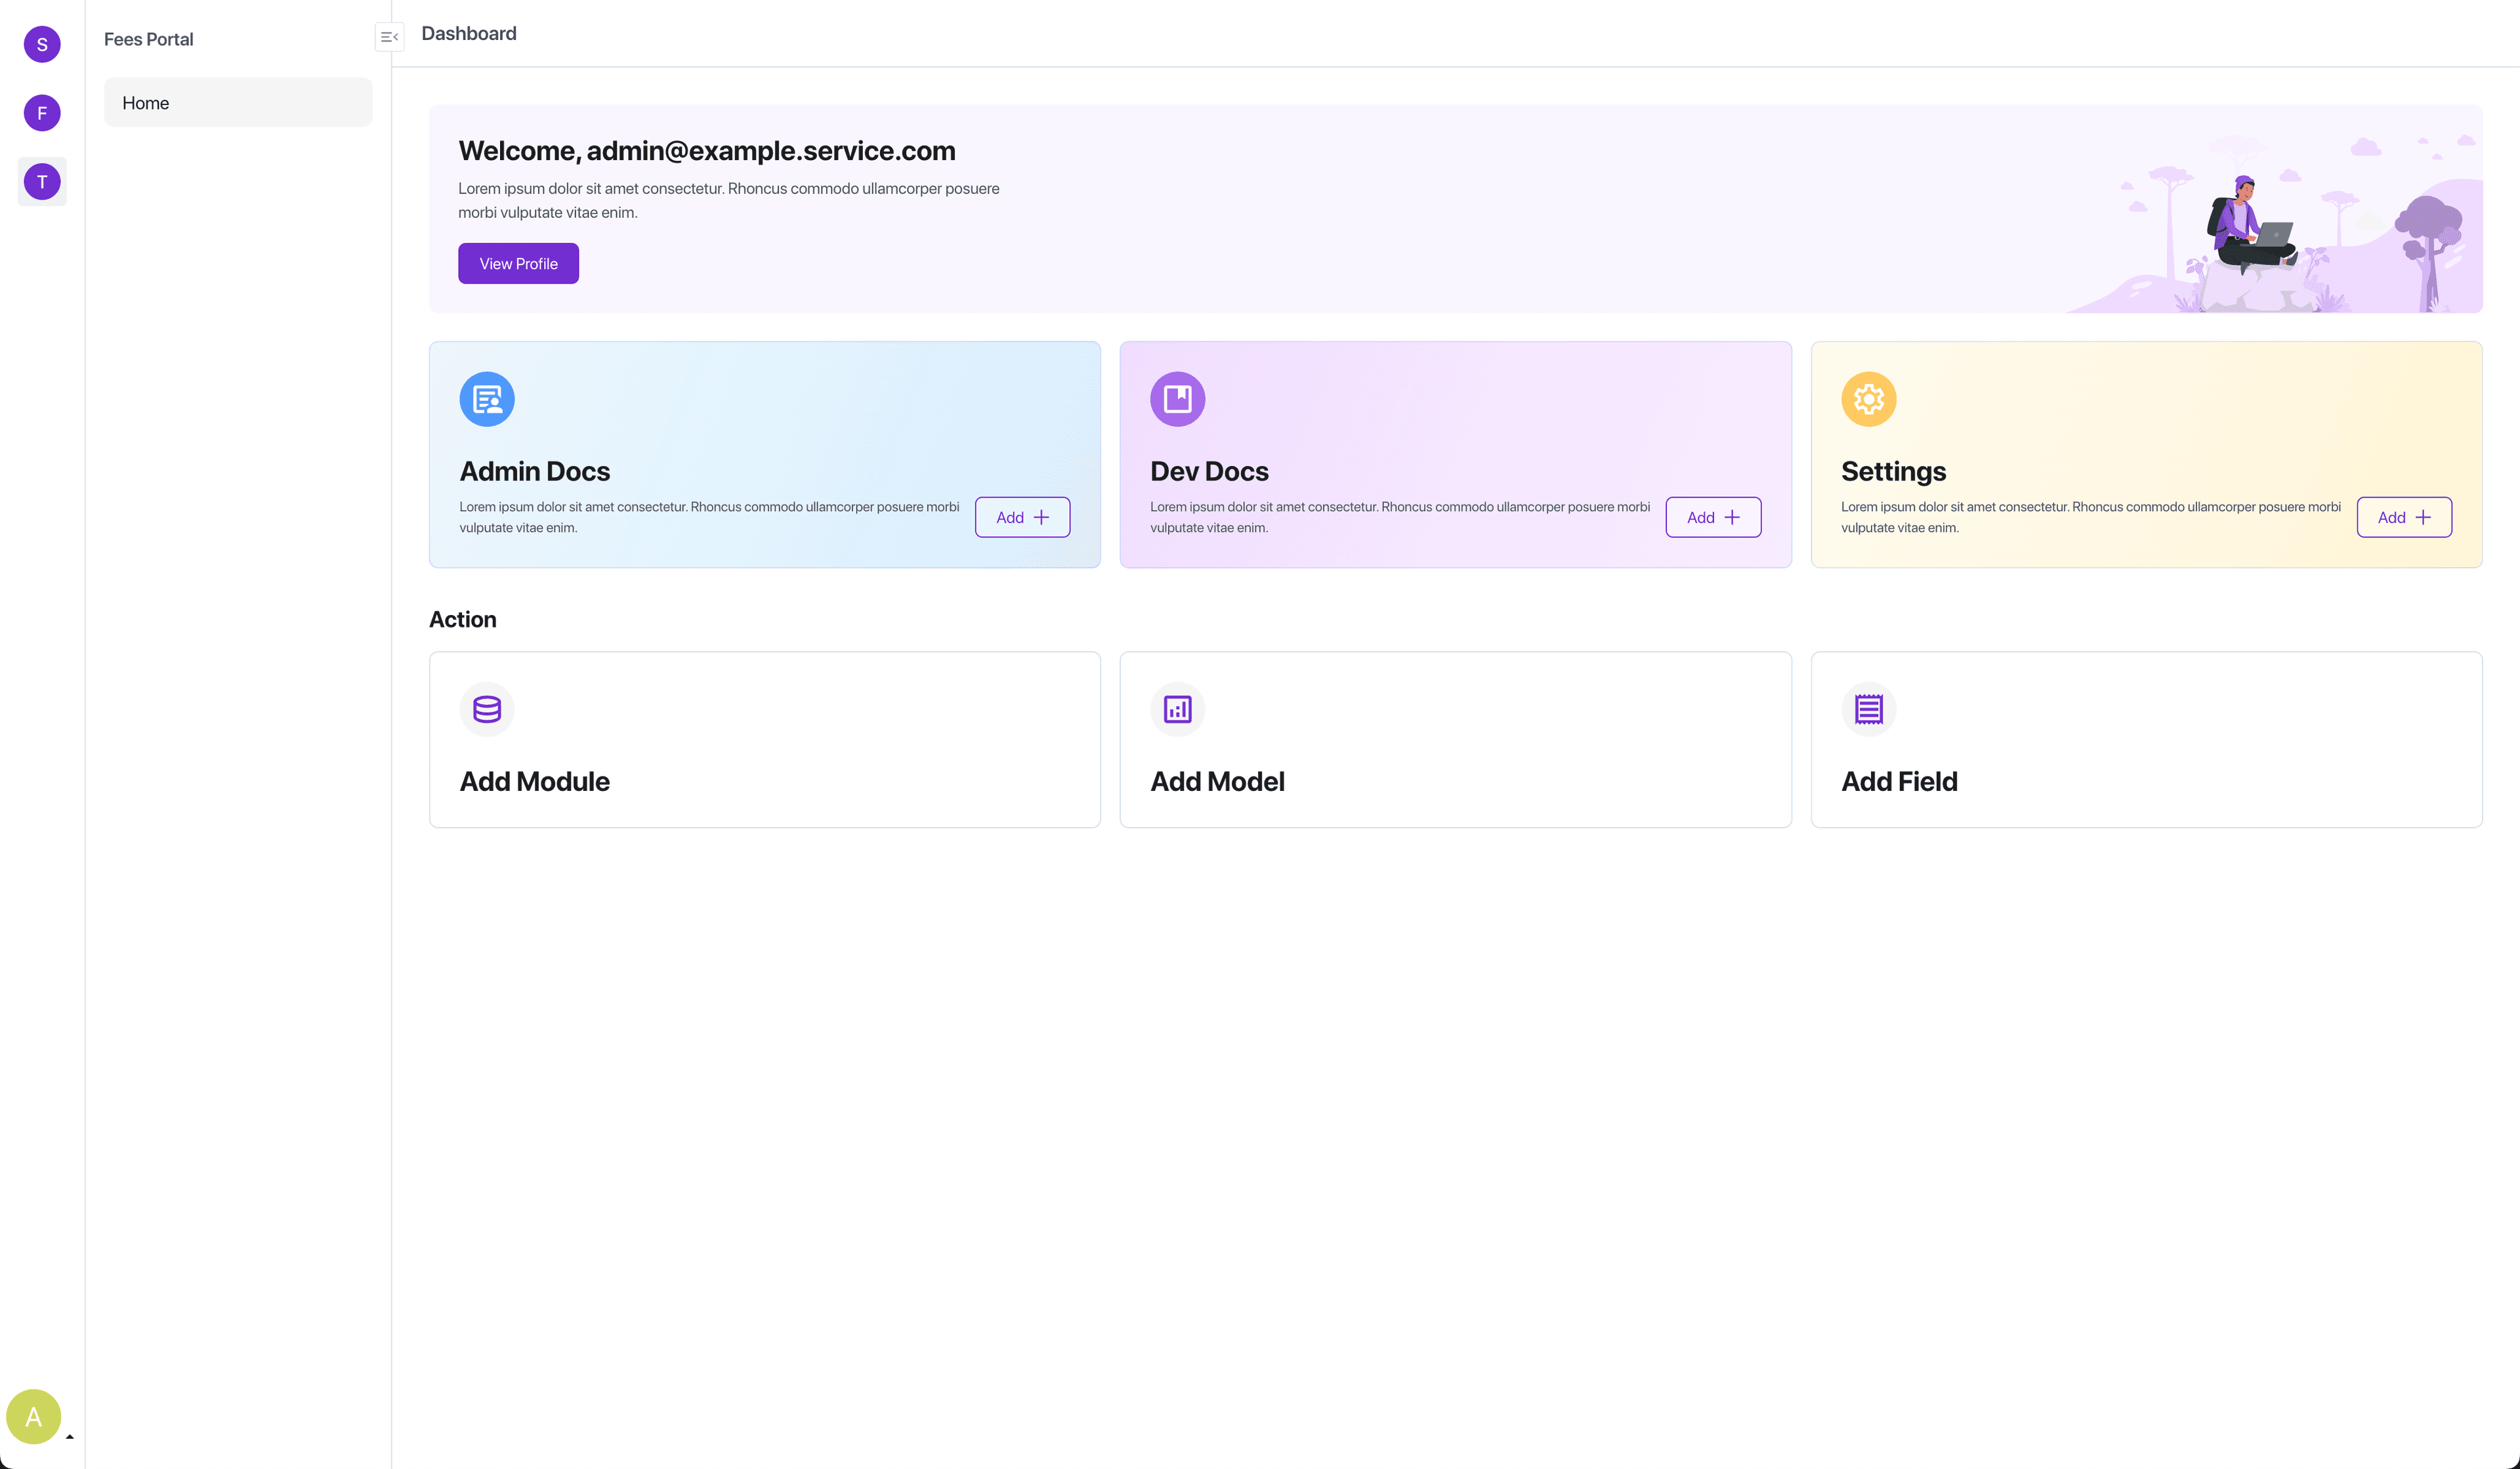
You can get rid of the default home page generated and instead put a custom dashboard for this module. We will be doing this in a later step in this tutorial.
Now we can move on to creating all the models in our system.
Model
To create models you need to go to Solid Core > App Builder > Model and then click on the Add button. You will first need to fill out the basic details about this model, look at the below screenshot for a sample.
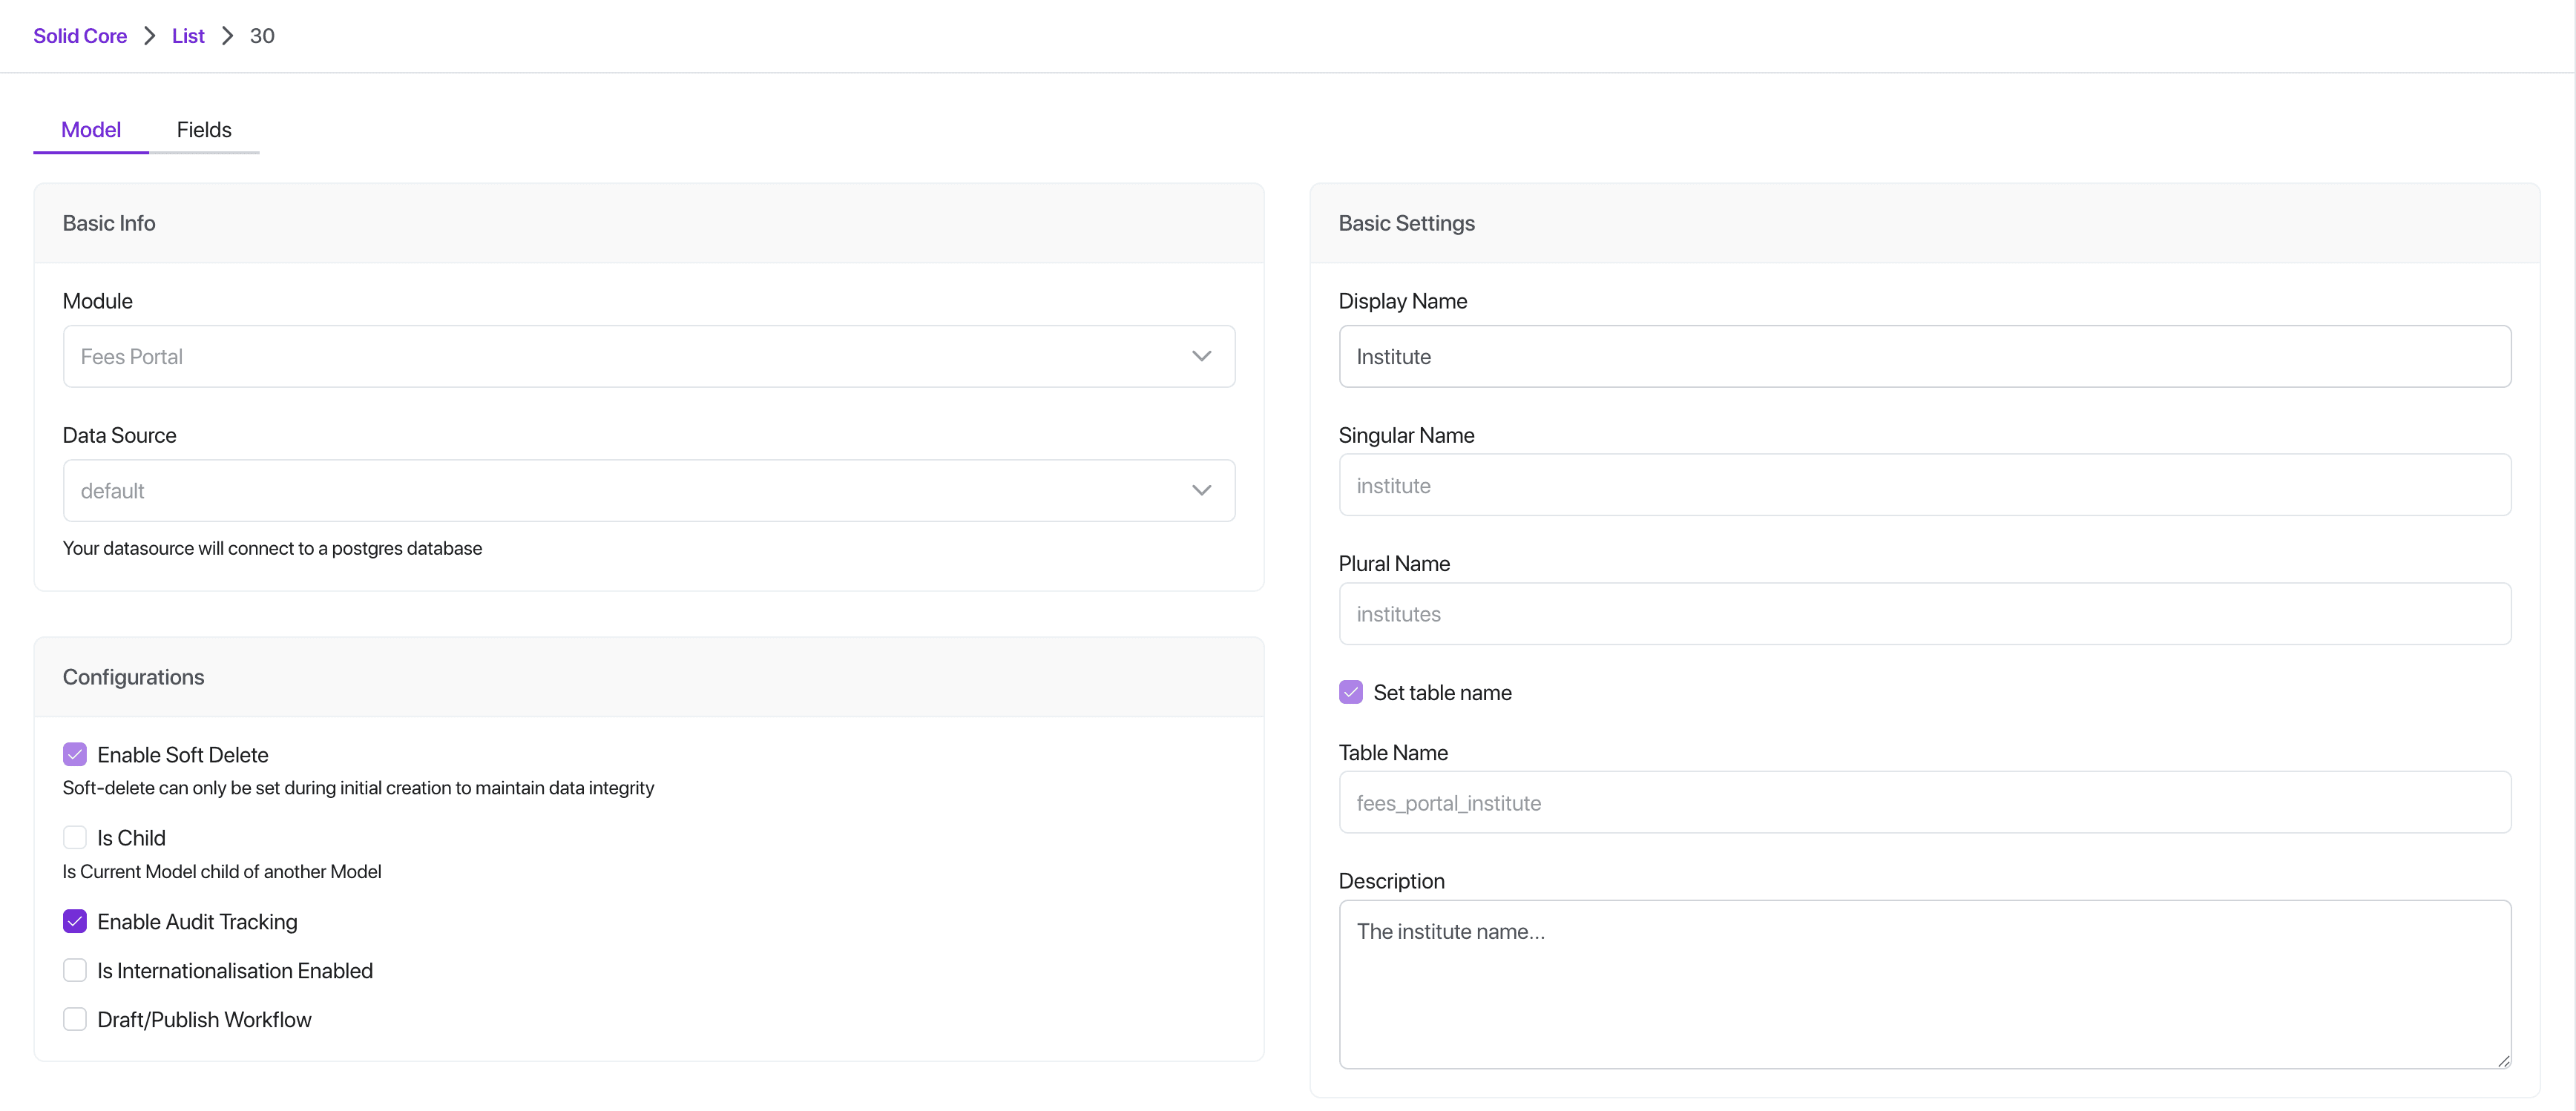
For this tutorial we will be marking all models as soft delete aware & also enable audit tracking on all models.
All fields in the model form are explained in detail here.
On similar lines you can add all fields to the newly created model, more details on all field types supported can be found here.
For all the models listed below, please make sure to add all the fields, save the model and then use the row actions to generate the code for this model.
1. Institute
We need a model to store the institute details, the fields involved are.
| Column Name | SolidX Type | Advanced Config |
|---|---|---|
| instituteName | shortText | required, unique, indexed, audited & also marked as Userkey |
| logo | mediaSingle | required |
| description | longText | - |
| hostedPagePrefix | shortText | required, unique, indexed, audited |
| paymentGatewayMerchantId | shortText | required, unique, indexed |
| paymentGatewayAccessKey | longText | required, unique, indexed |
| paymentGatewayAccessSecret | shortText | required |
| pointOfContactName | shortText | - |
| pointOfContactEmail | shortText | - |
| pointOfContactMobile | shortText | - |
| instituteAddress | longText | - |
| instituteContactNumber | shortText | - |
| instituteContactEmail | shortText | - |
Since the institute model is soft delete aware read this recipe on the impact of this on code generation.
At this point you can go ahead and generate the code for this entity.
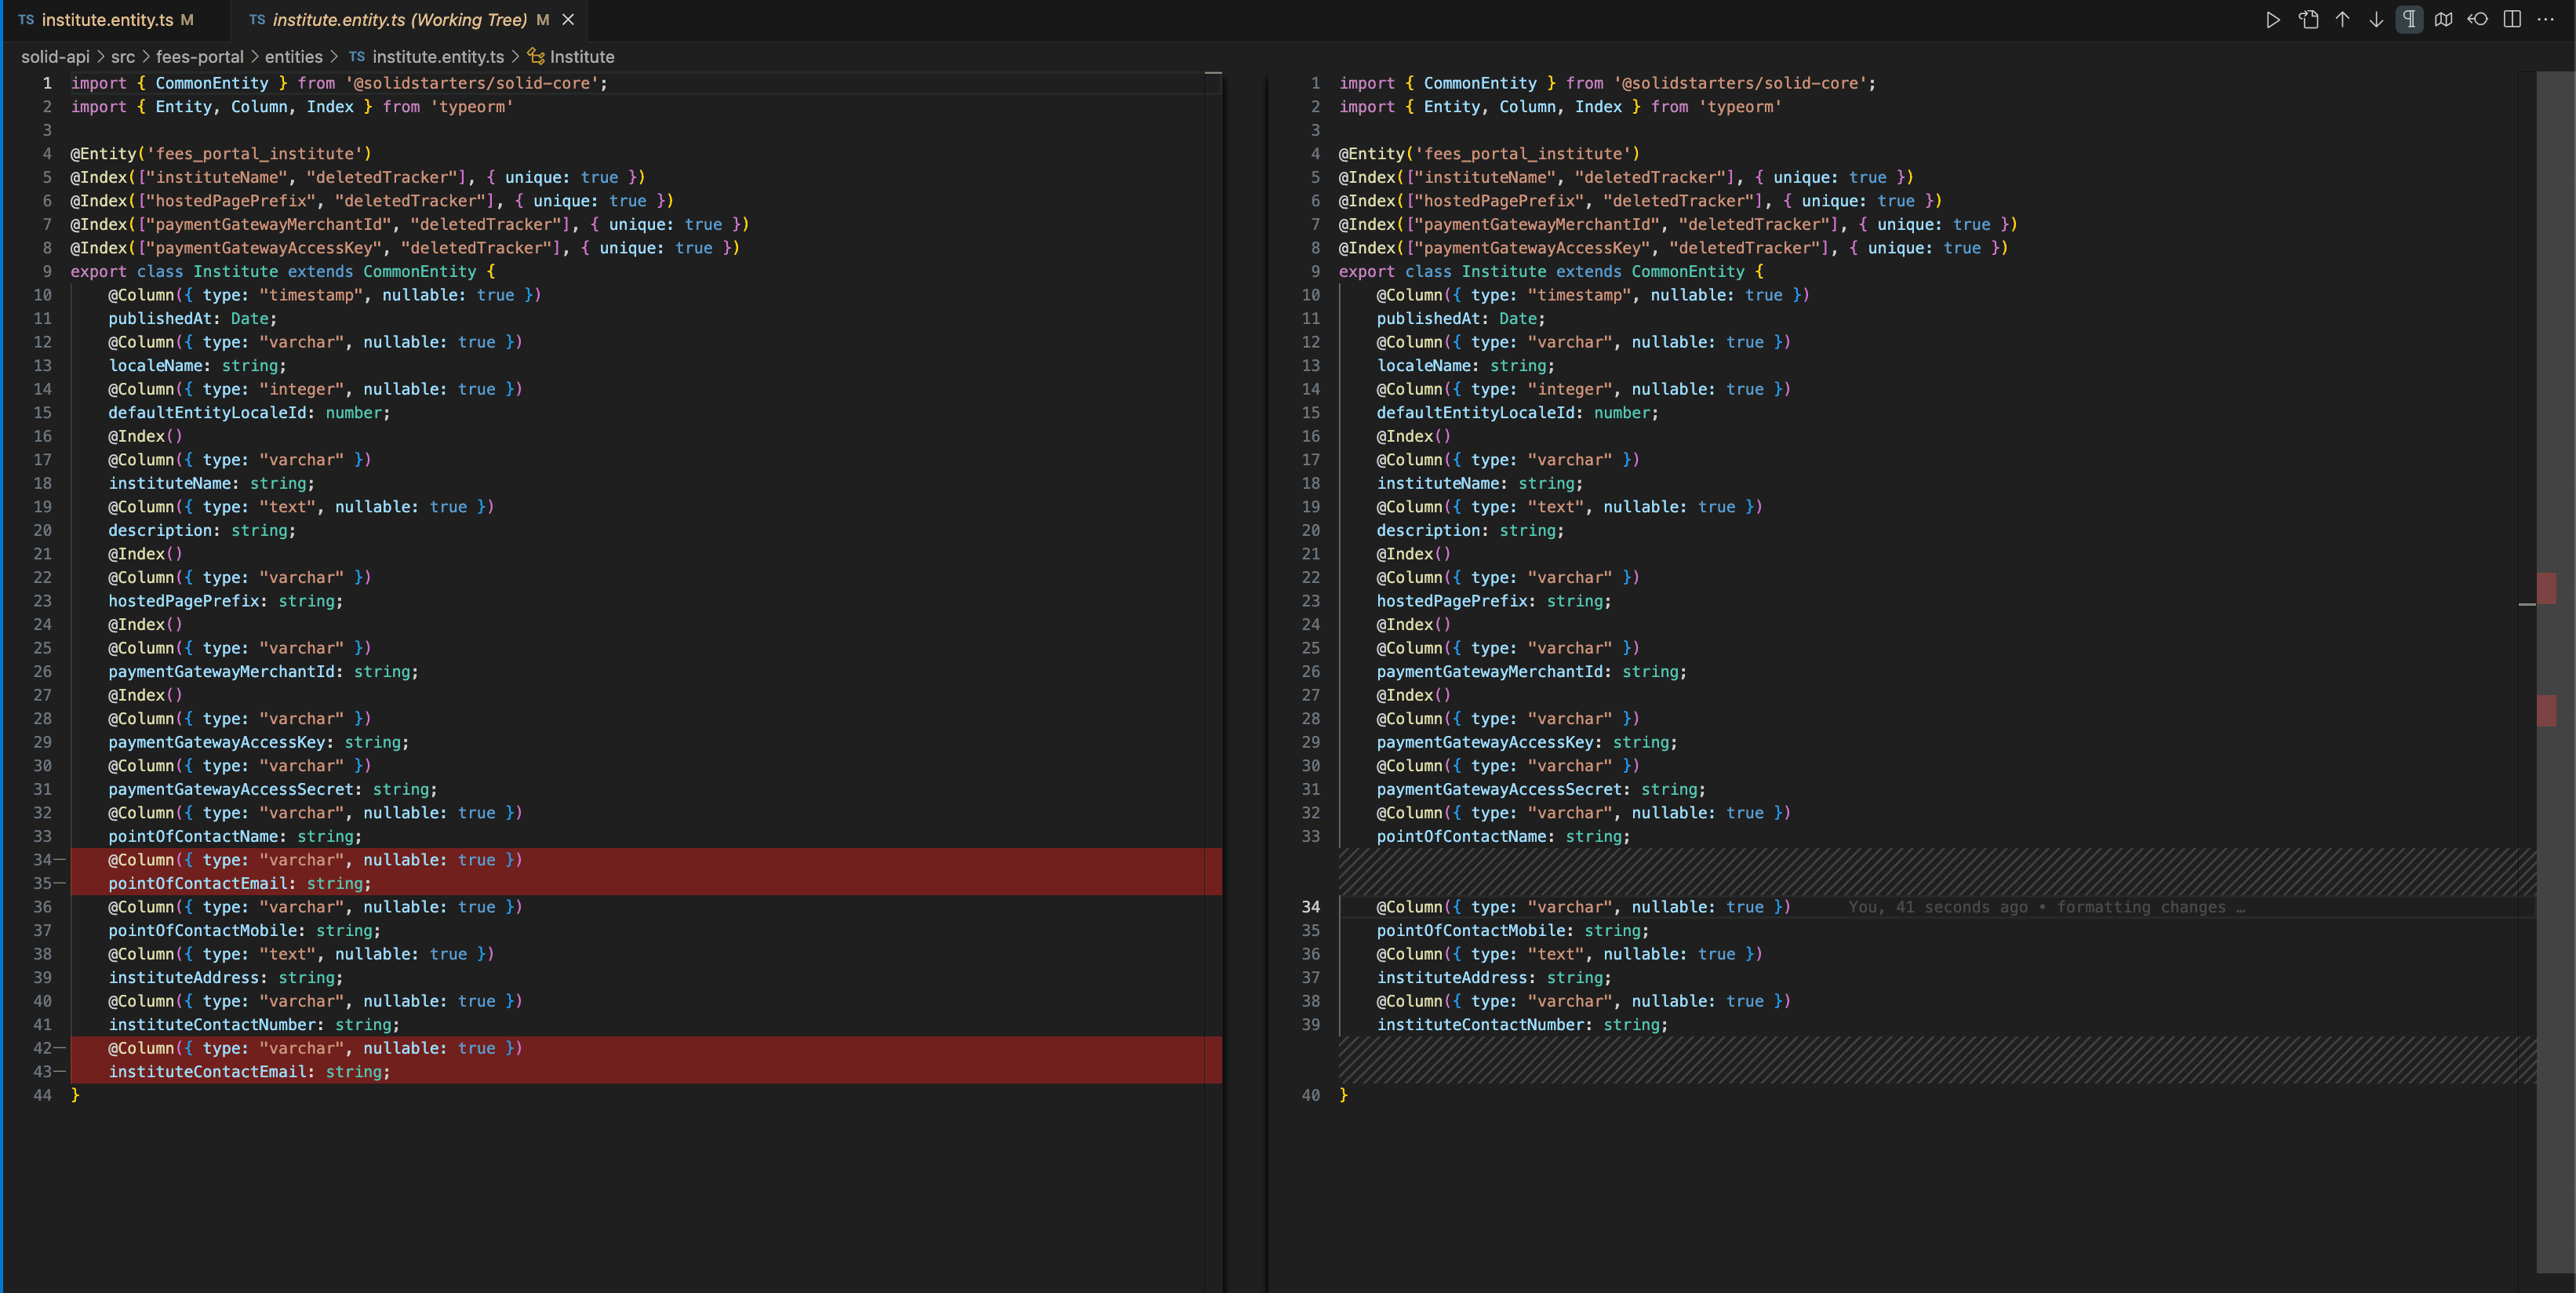
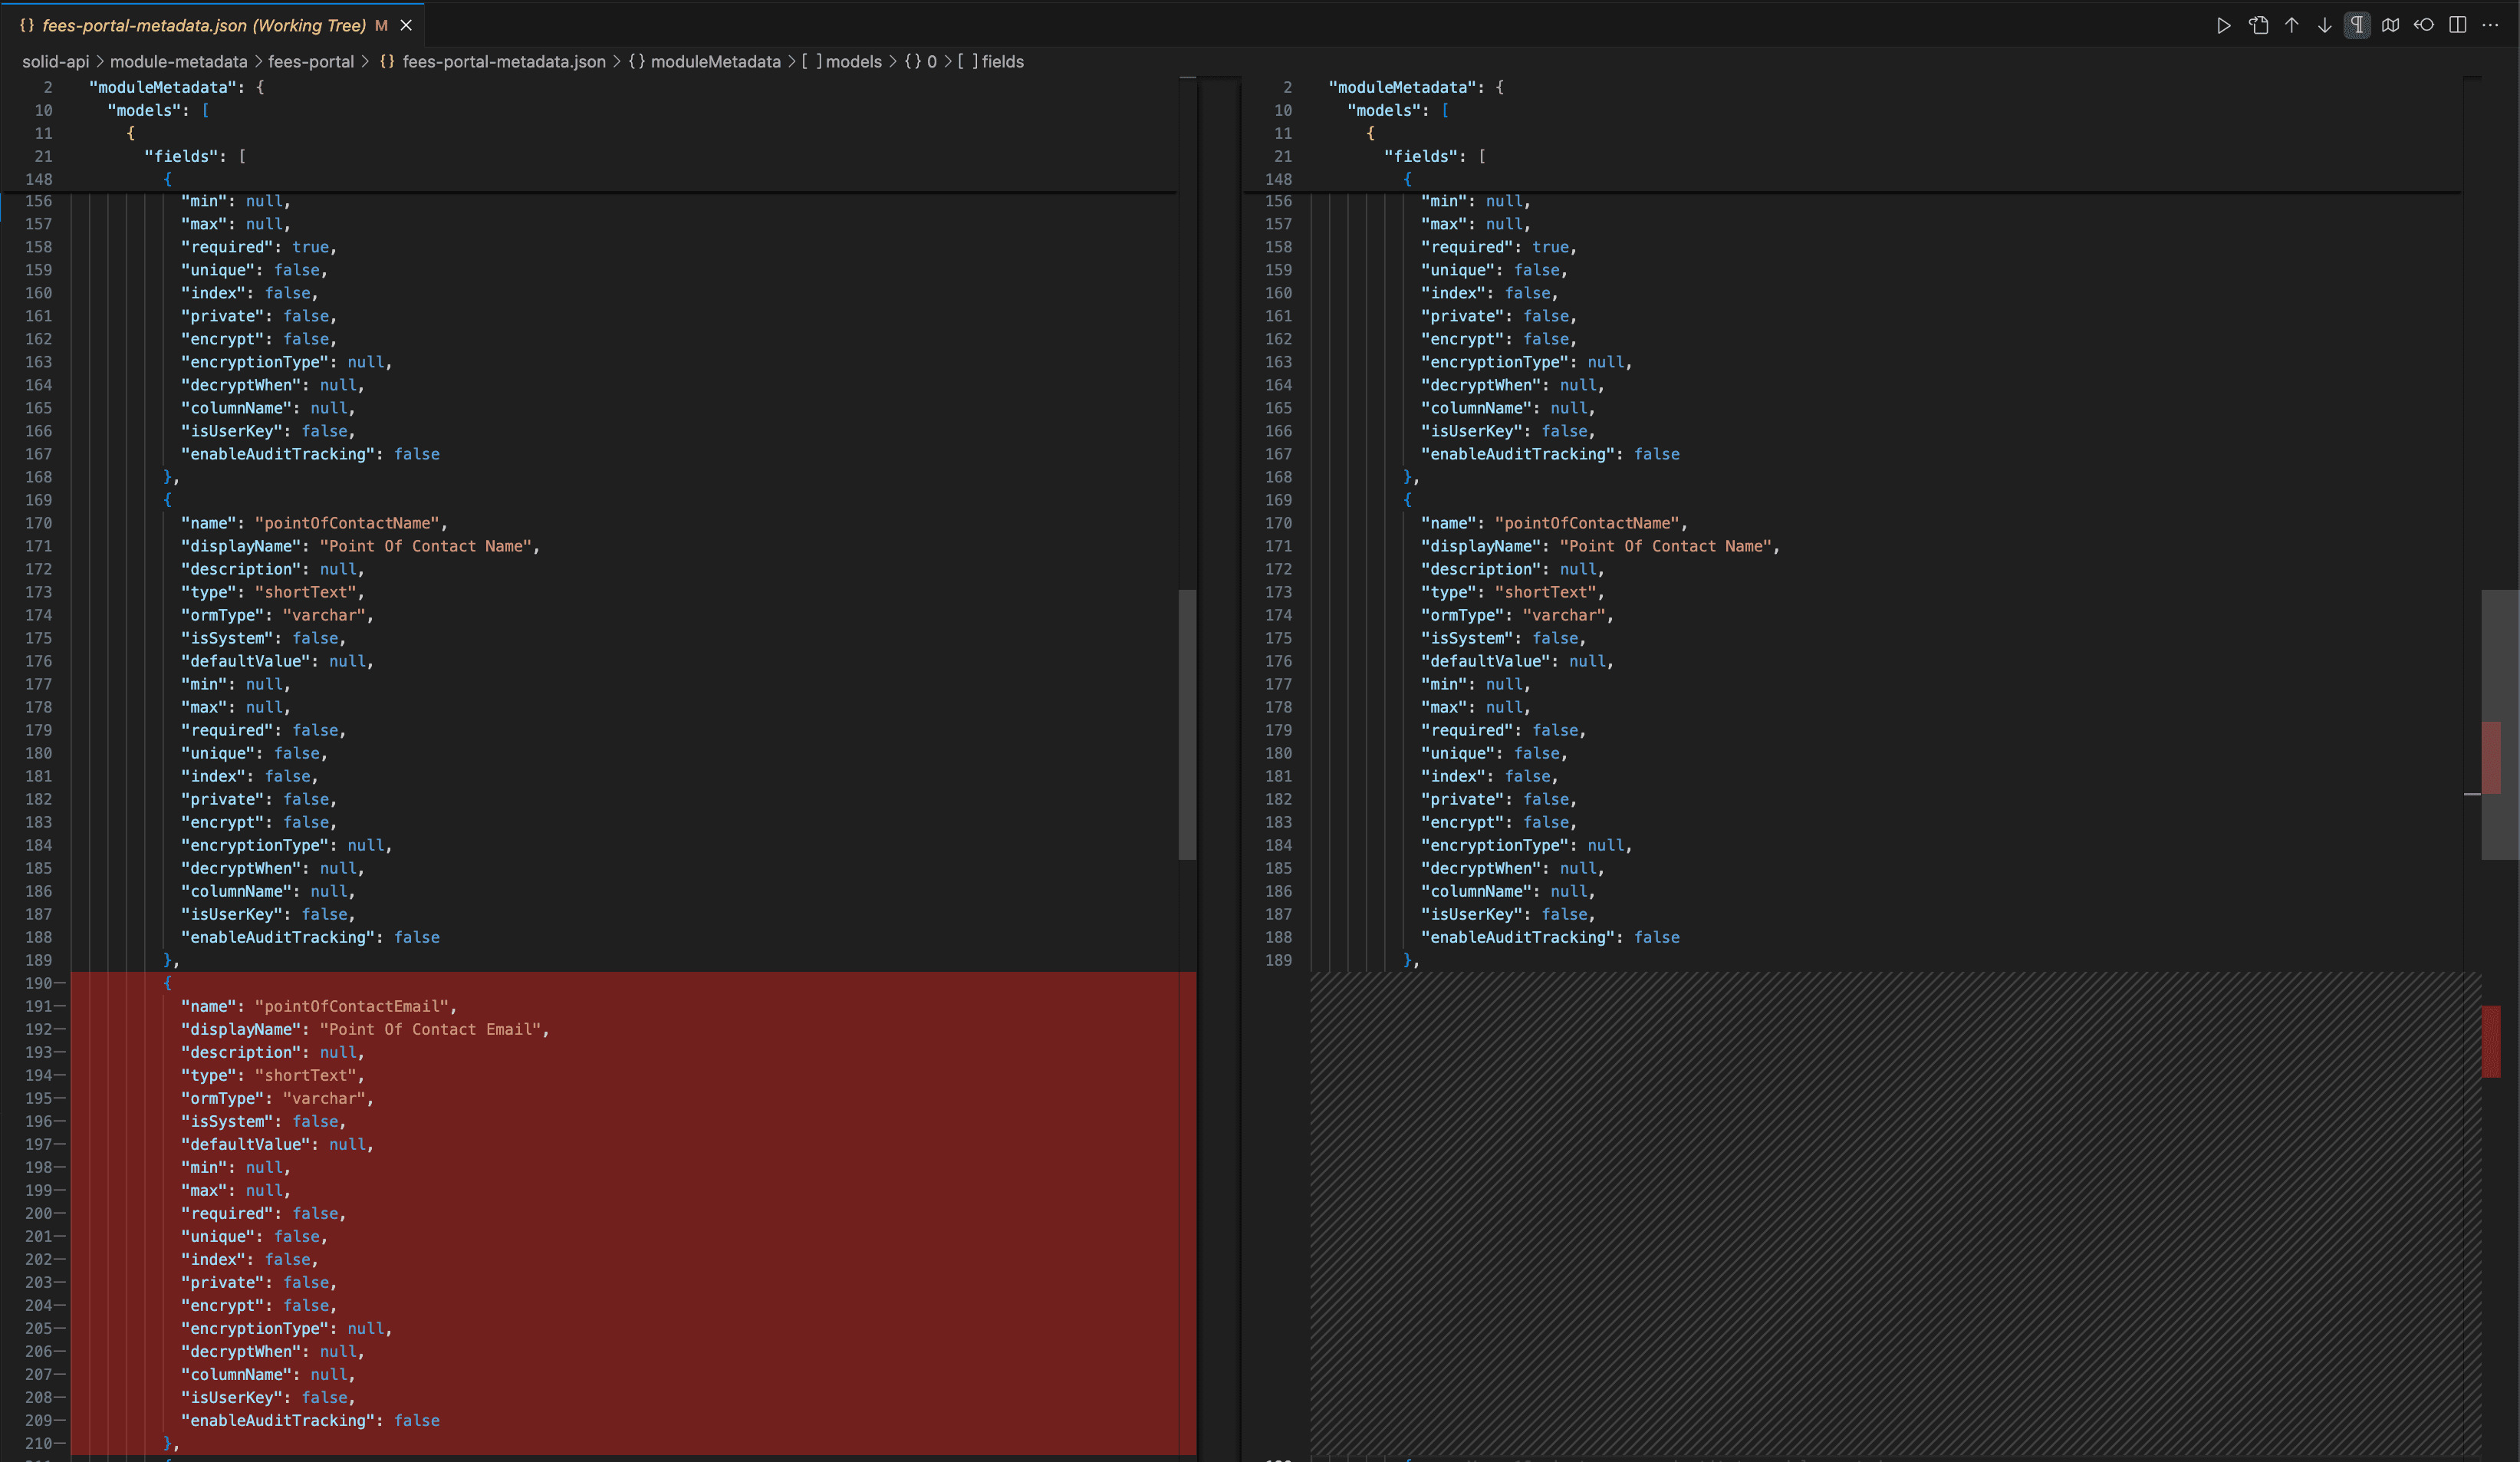
After adding the above fields we realise that the instituteContactEmail and pointOfContactEmail fields could have been set as SolidX type email.
To do this we need to
-
Delete the fields.
-
Save the model metadata.
-
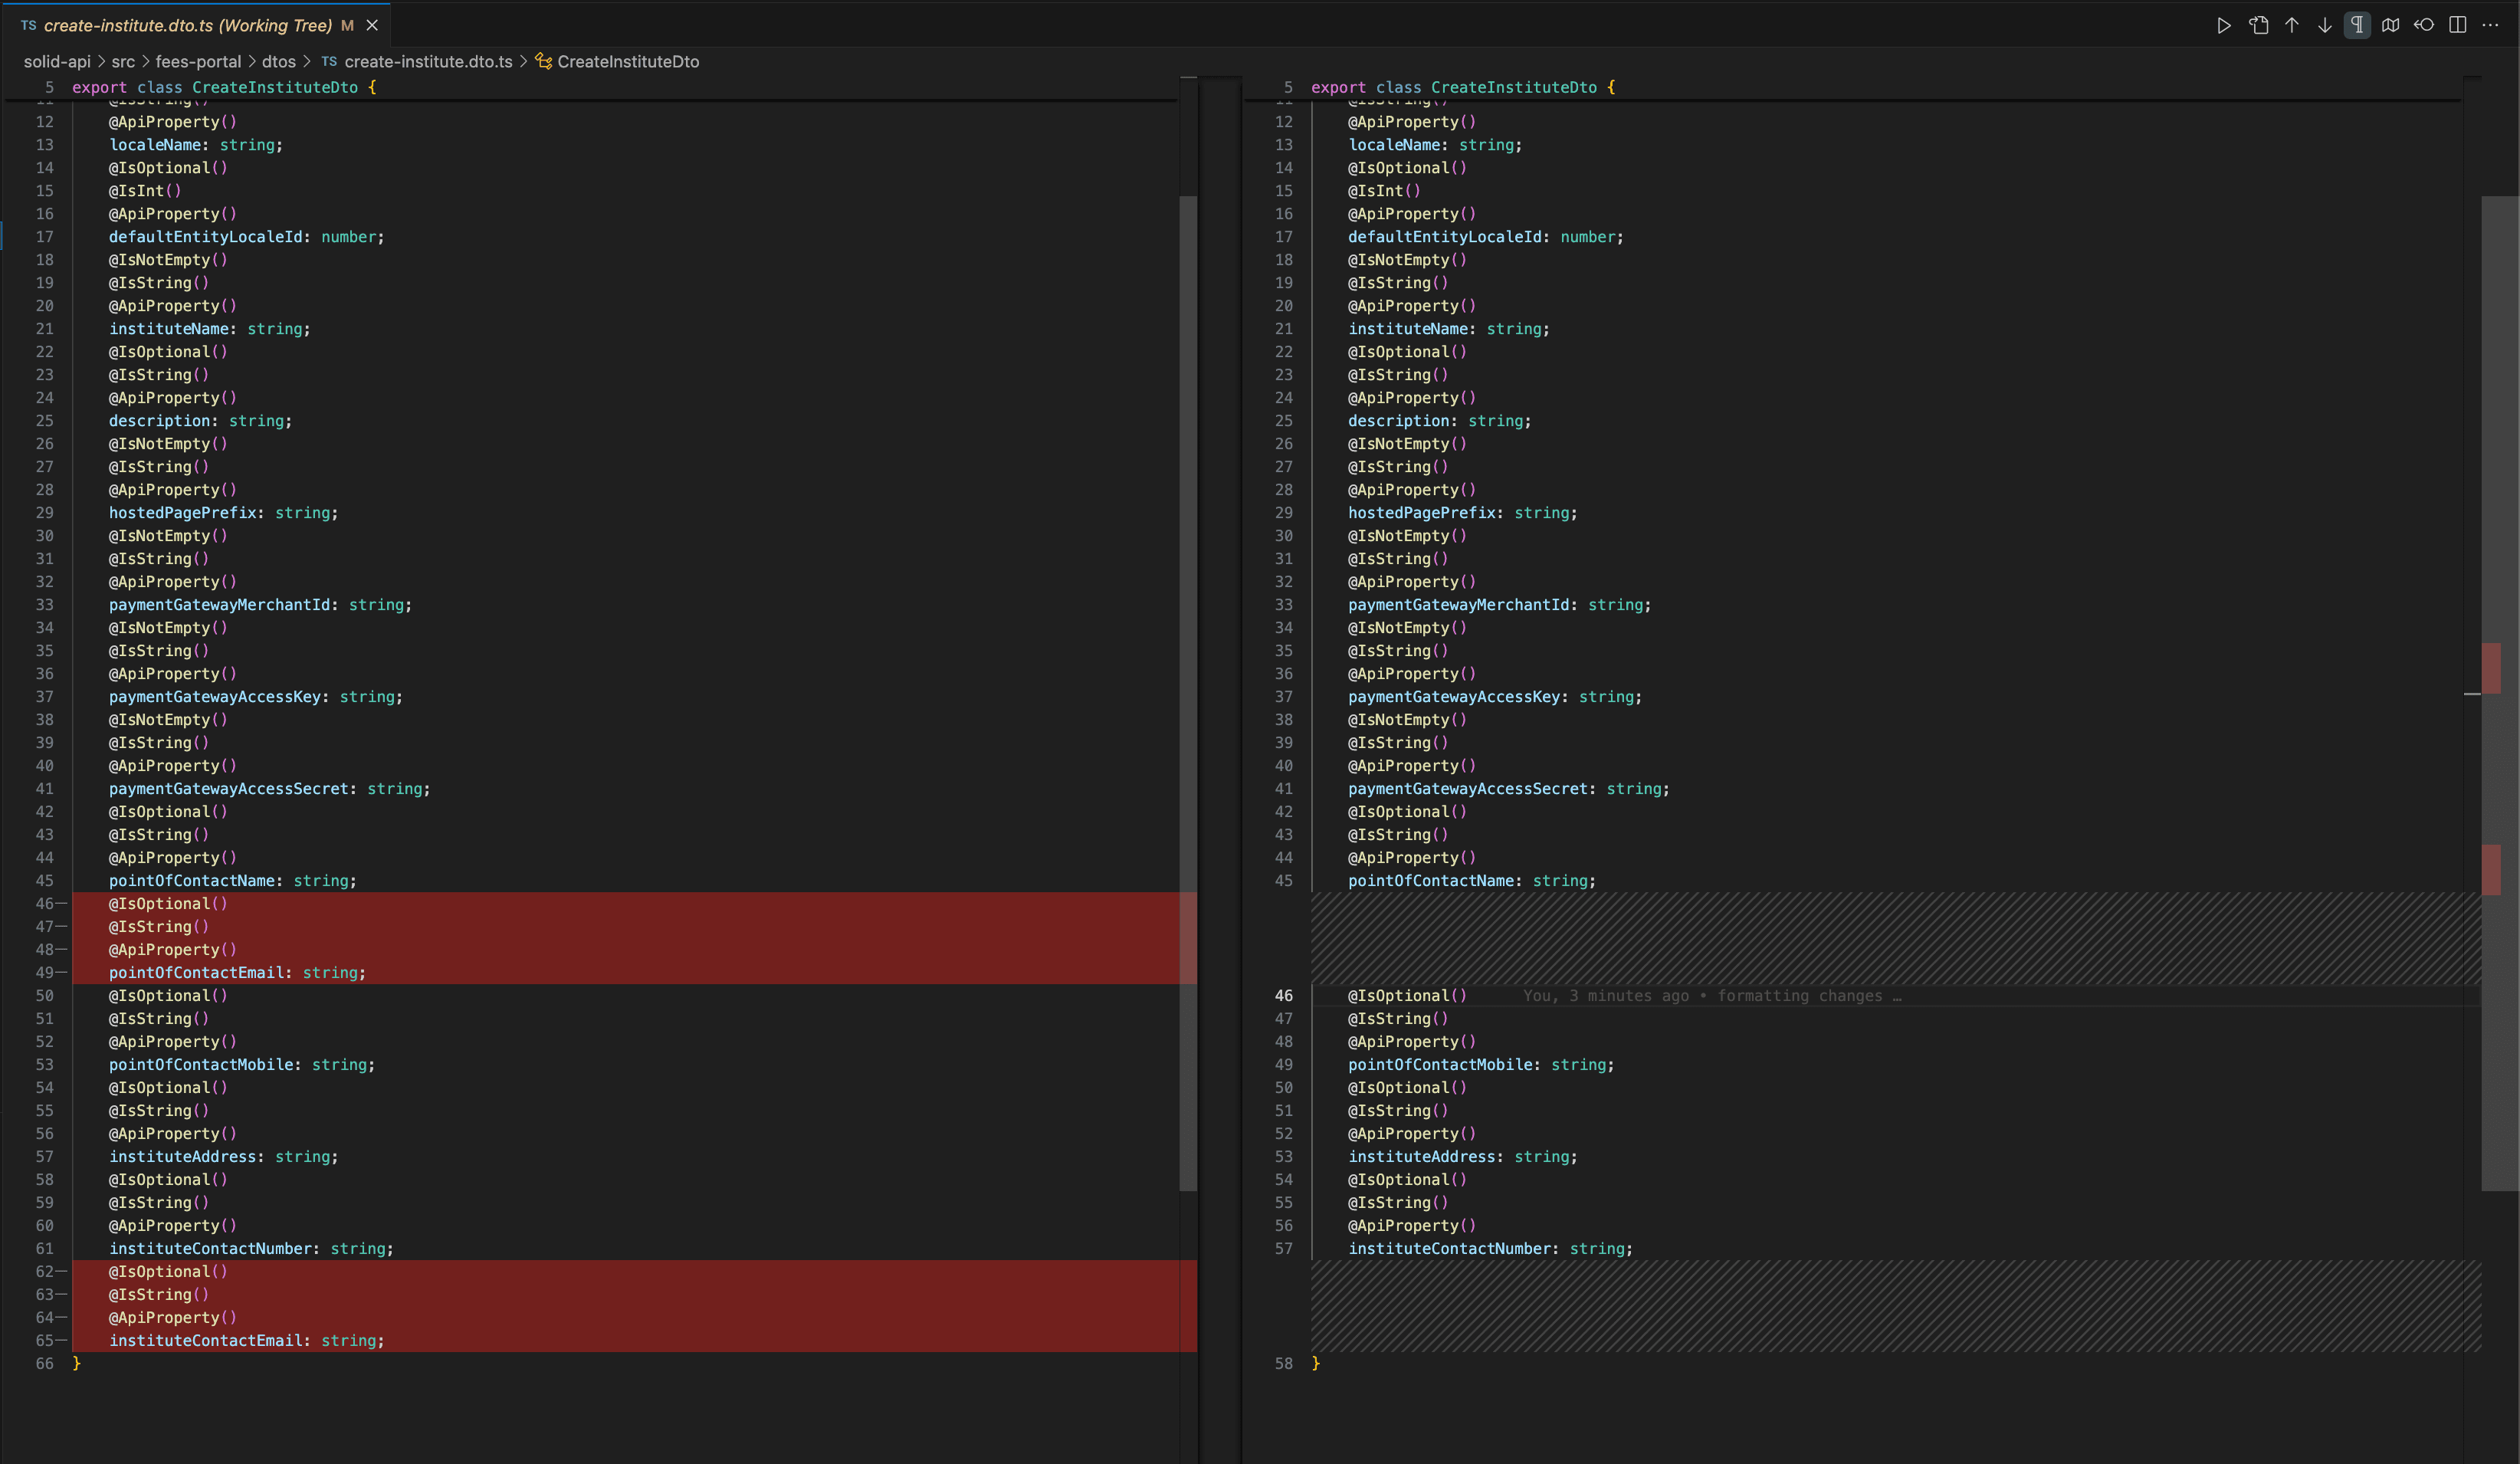
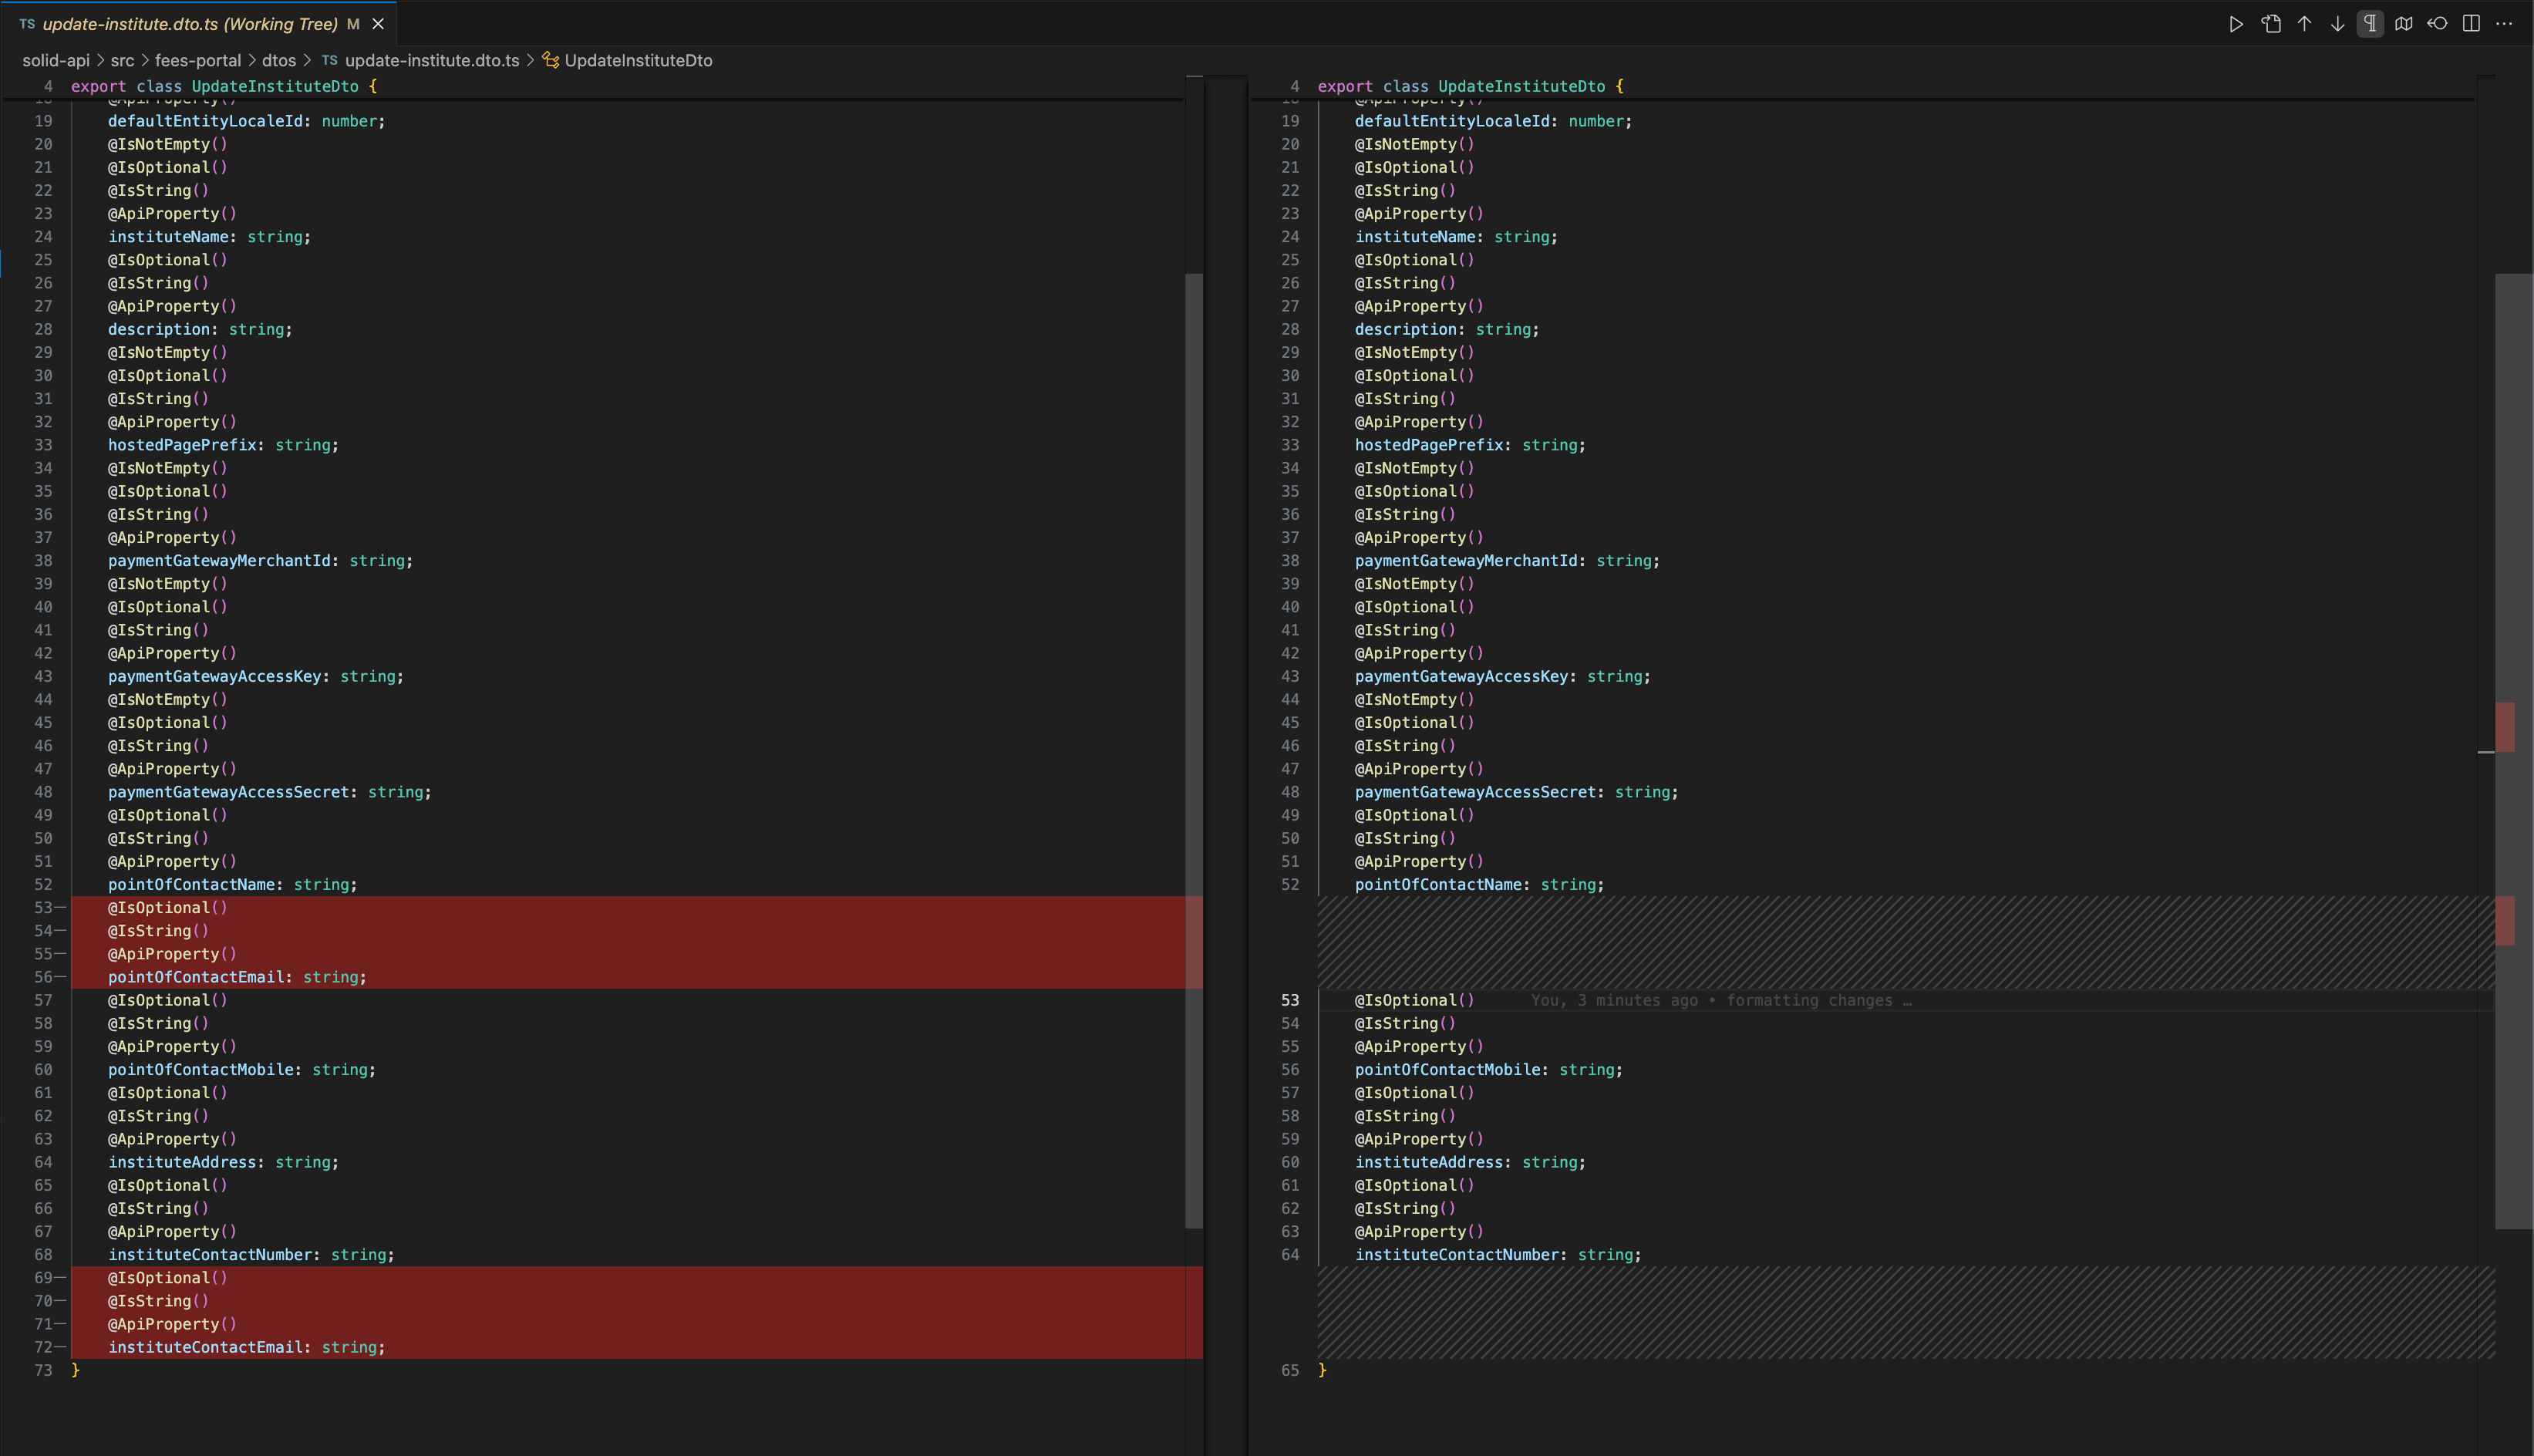
Use the row action to generate the code. (At this point if you see the code diff in your vscode you will see that the fields have been deleted).
Look at these images to see what it looks like on my laptop.
solid-api/src/fees-portal/dtos/create-institute.dto.ts
solid-api/src/fees-portal/dtos/update-institute.dto.ts
solid-api/src/fees-portal/entities/institute.entity.ts
solid-api/module-metadata/fees-portal/fees-portal-metadata.json
-
Re-add them with the correct type.
This gives you an idea of how you can modify fields which have been added earlier to your SolidX model.
2. Institute User
This table allows us to configure users of the fees portal, using this model we can create
3. Institute Fee Type
Every Institute can configure multiple types of fees, the fields involved are
| Column Name | SolidX Type | Advanced Config |
|---|---|---|
| feeType | shortText | required |
| institute | relation | required, manyToOne |
4. Institute Reminder
This table allows us to store schedule reminder configuration records, the fields involved are
| Column Name | SolidX Type | Advanced Config |
|---|---|---|
| scheduleName | shortText | required |
| isActive | boolean | required |
| frequency | selectionStatic | required |
| startTime | time | |
| endTime | time | |
| startDate | date | |
| endDate | date | |
| dayOfWeek | selectionStatic | |
| dayOfMonth | int | |
| lastRunAt | datetime | |
| nextRunAt | datetime | |
| job | selectionStatic | required |
| institute | relation | required |
5. Student
This table allows us to store student records institute wise, the fields involved are
| Column Name | SolidX Type | Advanced Config |
|---|---|---|
| studentName | shortText | required |
| studentEmailAddress | shortText | |
| studentMobileNumber | shortText | |
| parentName | shortText | required |
| parentMobileNumber | shortText | required |
| parentEmailAddress | shortText | |
| studentId | shortText | required |
| institute | relation | required, manyToOne |
6. Payment Collection
This table allows us to store payment collection records institute wise, the fields involved are
| Column Name | SolidX Type | Advanced Config |
|---|---|---|
| name | shortText | required, unique, indexed, audited & also marked as Userkey |
| description | longText | required |
| instituteId | relation | required, manyToOne |
| paymentFile | mediaSingle | required, 5Mb, default-aws-s3 |
7. Payment Collection Item
This table allows us to store payment collection collected for user, the fields involved are
| Column Name | SolidX Type | Advanced Config |
|---|---|---|
| student | relation | required, manyToOne |
| paymentCollectionRequest | relation | required, manyToOne |
| institute | relation | required, manyToOne |
| feeType | relation | required, manyToOne |
| dueDate | date | required |
| amountToBePaid | decimal | required |
| partPaymentAllowed | boolean | required |
| status | selectionStatic | required |
| amountPaid | decimal | required |
| amountPending | decimal | required |
| isOverdue | boolean | required |
| overdueByDays | int | required |
8. Payment Collection Item Detail
This table allows us to store payment collection detail of user, the fields involved are
| Column Name | SolidX Type | Advanced Config |
|---|---|---|
| institute | relation | required, manyToOne |
| student | relation | required, manyToOne |
| paymentCollectionItem | relation | required, manyToOne |
| paymentDate | datetime | required, manyToOne |
| amountPaid | decimal | required |
| isRefunded | boolean | |
| status | selectionStatic | required |
| payment | relation | required, manyToOne |
9. Payment
This table allows us to store payment records of a user, the fields involved are
| Column Name | SolidX Type | Advanced Config |
|---|---|---|
| institute | relation | required, manyToOne |
| student | relation | required, manyToOne |
| mSwipeIpgOrderId | shortText | |
| mSwipeIpgPaymentId | shortText | |
| mSwipeIpgTransId | shortText | |
| mSwipeIpgInvoiceId | shortText | |
| mSwipeEncodedIpgId | shortText | |
| mSwipeIpgStatus | shortText | |
| isRefunded | boolean | required |
| paymentStatus | selectionStatic | required |