SolidX itself is lightweight and does not require significant memory.
The requirements above are intended for a smooth local development experience,
especially when running development tools and containers.
SolidX requires a relational database to store application data / metadata. Currently supported databases include PostgreSQL and MSSQL. We will be using PostgreSQL for this tutorial.
This guide explains how to install and run PostgreSQL 17 locally using Docker.
This approach avoids installing PostgreSQL directly on your system and provides a clean, reproducible setup.
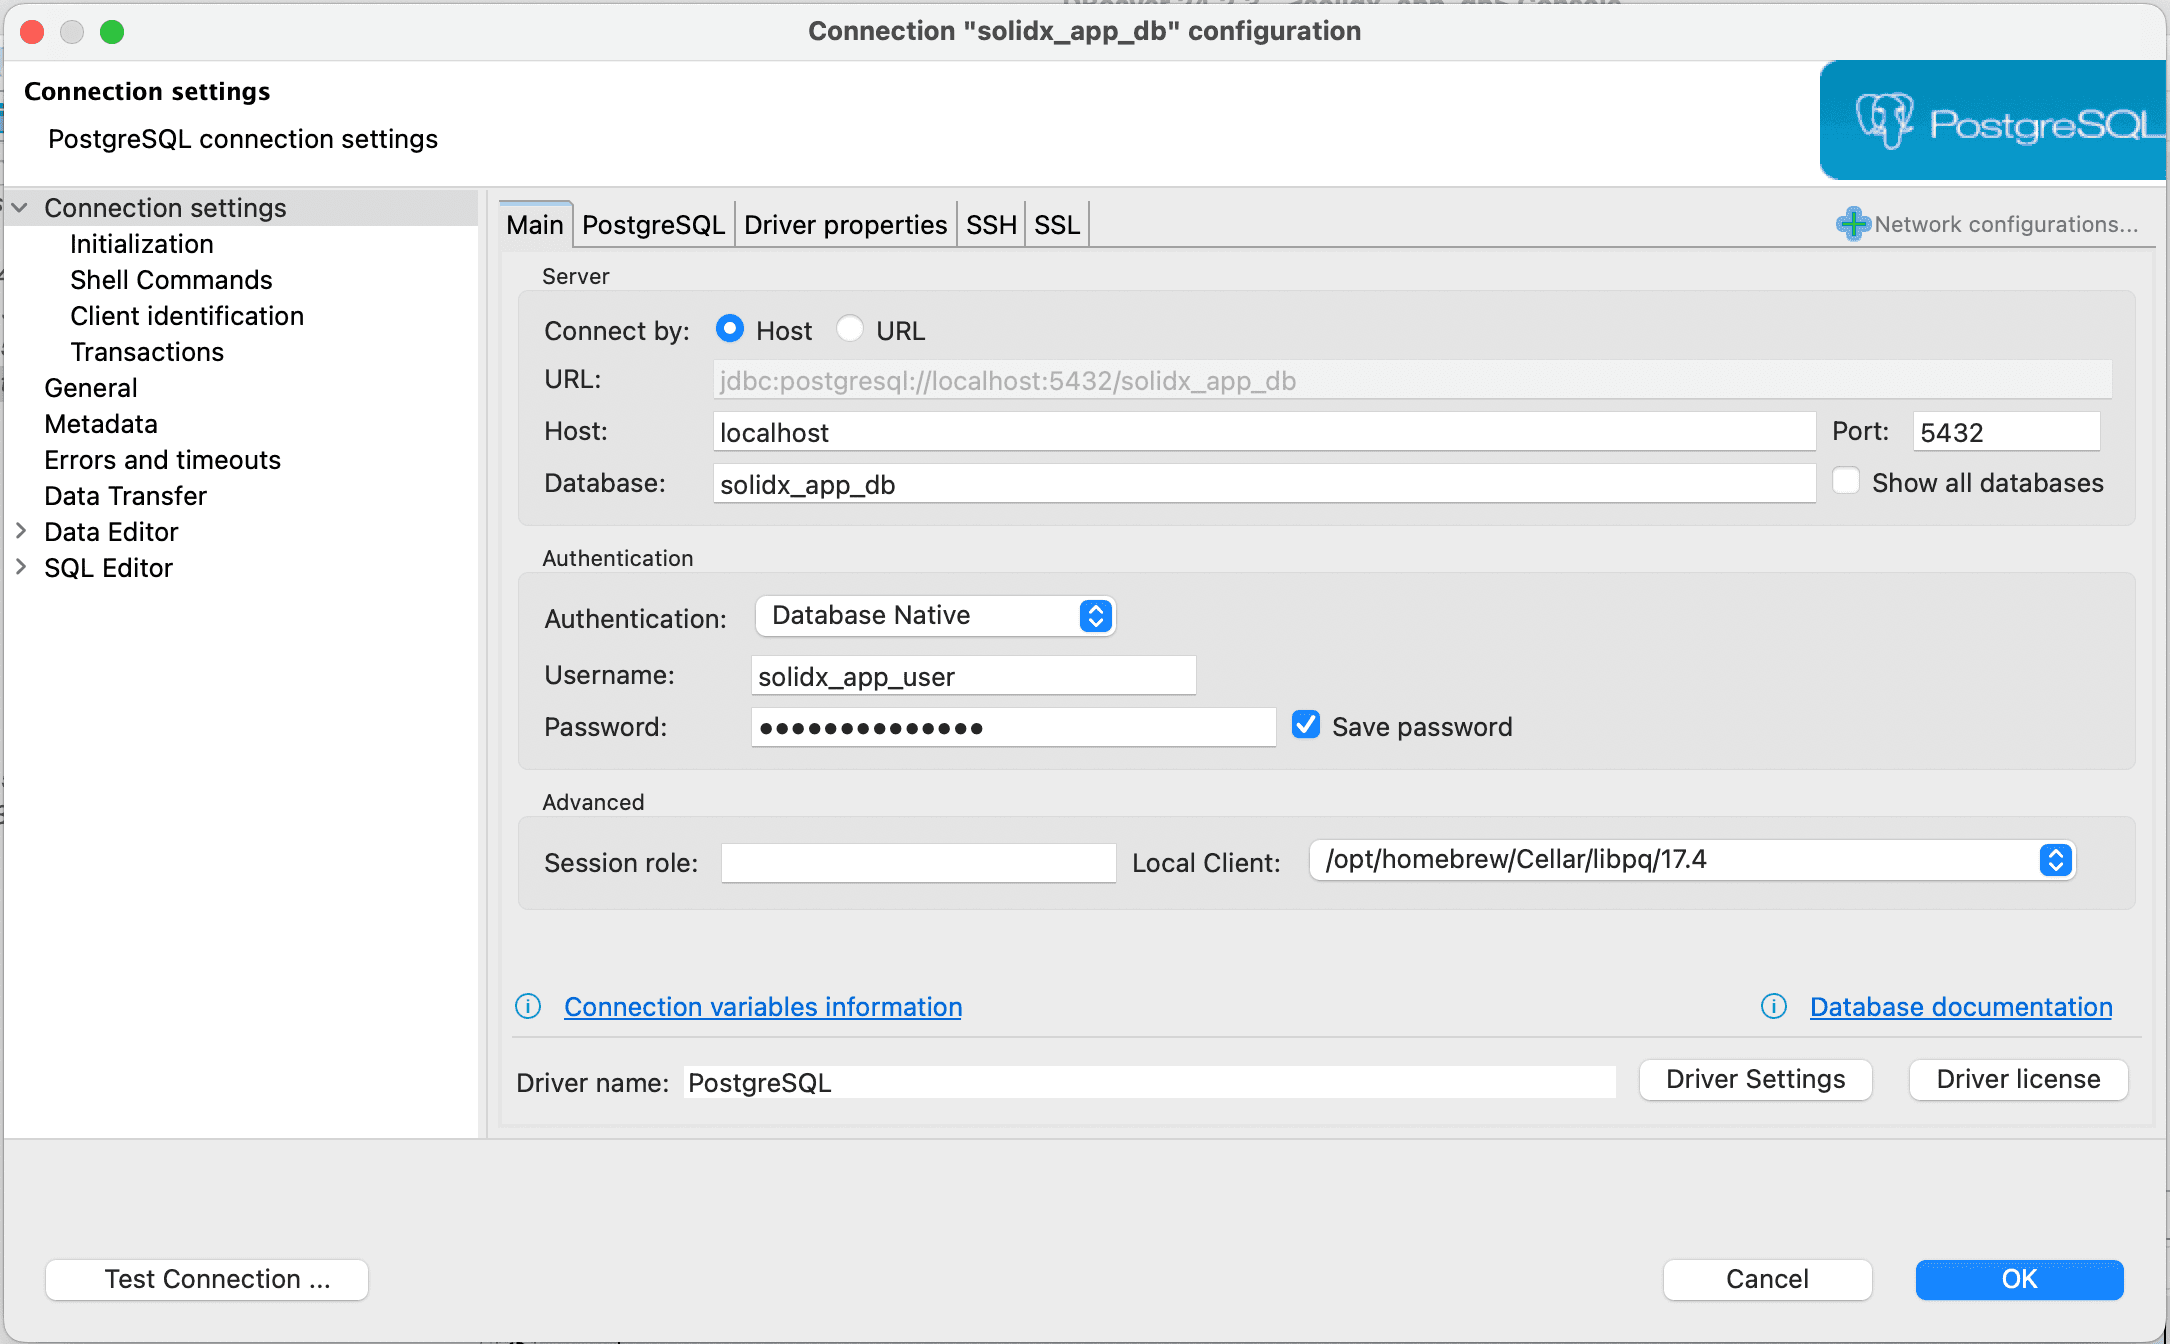
Use the following details in your application or database client e.g pgAdmin, DBeaver, or any PostgreSQL client.
- Host: localhost
- Port: 5432
- Username: solidx_app_user
- Password: strongpassword
- Database: solidx_app_db
Screenshot showing how to connect to the running PostgreSQL server using DBeaver
Running PostgreSQL using Docker is recommended for local development and testing environments.
For production deployments, it is advised to use a managed PostgreSQL service or a carefully maintained database setup with proper backups, monitoring, and high availability.
Tip
If you want to reset the database and start afresh, you can remove the Docker volume storing the data.
# Stop the container firstdocker stop SolidX_DB# Remove the containerdocker rm SolidX_DB# Then remove the volume# Warning: This deletes all data in the database!docker volume rm solidx_pgdata
Then you can re-run the container using the command in Step 2 to create a fresh database.
To create a new SolidX application, run the following command in your terminal:
npx @solidstarters/create-solid-app
This command launches an interactive setup and generates a fully configured SolidX workspace, ready for development.
Follow the prompts to configure your application:
Project Name: Enter a name for your SolidX application.
Example: school-fees-portal
Default: my-solid-app
Backend API Port: Enter the port for the backend API server.
Default: 3000
Database: Select the database for your application.
Options: PostgreSQL, MSSQL
Default: PostgreSQL
Database Host: Enter the database host address.
Default: localhost
Database Port: Enter the database port.
Default for PostgreSQL: 5432
Database Name: Enter the database name.
Default: solidx_app_db
Database Username: Enter the database username.
Default: solidx_app_user
Database Password: Enter the database password.
Default: strongpassword
Sync Database Schema: Choose whether to automatically synchronize the database schema.
Options: Yes, No
Default: Yes
:::warning
This option is not recommended for production environments, since it modifies the database schema automatically. It is advisable to manage database migrations manually in production.
:::
SolidX requires foundational metadata: system models, roles, users, email/SMS templates, dashboards, and lists of values.
The solid seed command automates this process by populating the database with all these essentials, making the application ready for immediate use.
To seed the database, navigate to the solid-api project directory and run solid seed:
cd school-fees-portal/solid-apisolid seed
The seed process also creates an super admin user, if one does not already exist. The credentials for this user are displayed in the terminal after seeding is complete.
Infosolid is the SolidX CLI utility installed as part of the SolidX scaffolding process.
Tip
You can run solid --help to see all available commands and options.
This command reads predefined JSON files containing the necessary metadata and populates the database accordingly.
Use the credentials displayed after seeding to access the admin panel with full permissions.
Screenshot showing the SolidX admin panel login screen
After logging in, you will be redirected to the default landing page of the admin panel. This page by default is configured to show the listing of all users in the system.
Screenshot showing the default landing page after successful login
Your SolidX environment is now configured and the admin panel is accessible.
You're ready to build a fully functional school fees portal application using the SolidX App Builder. No coding required—just visual configuration to create entities, relationships, workflows, and business logic.

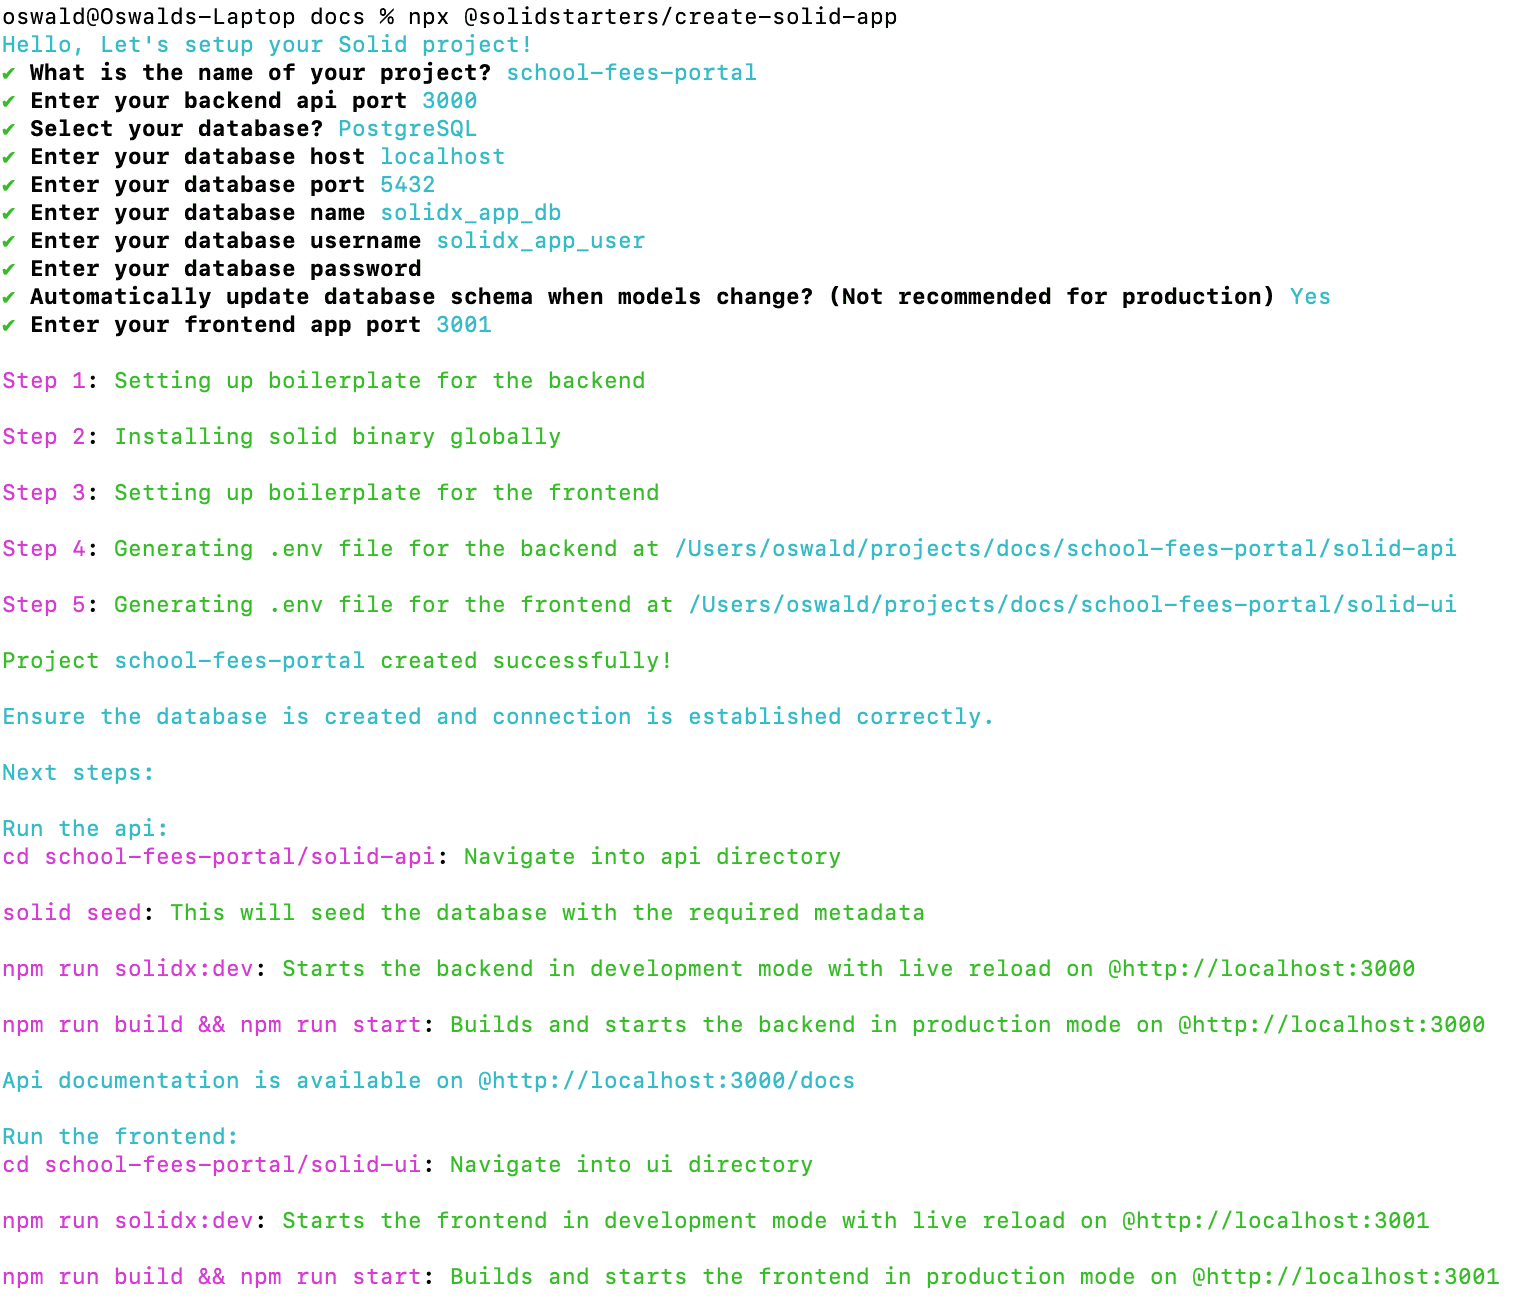 Screenshot showing the bootstrapping process in the terminal
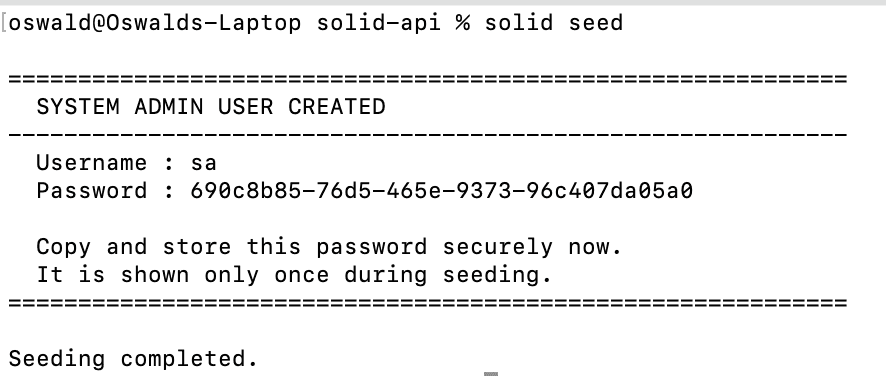 Screenshot showing the seeding process in the terminal
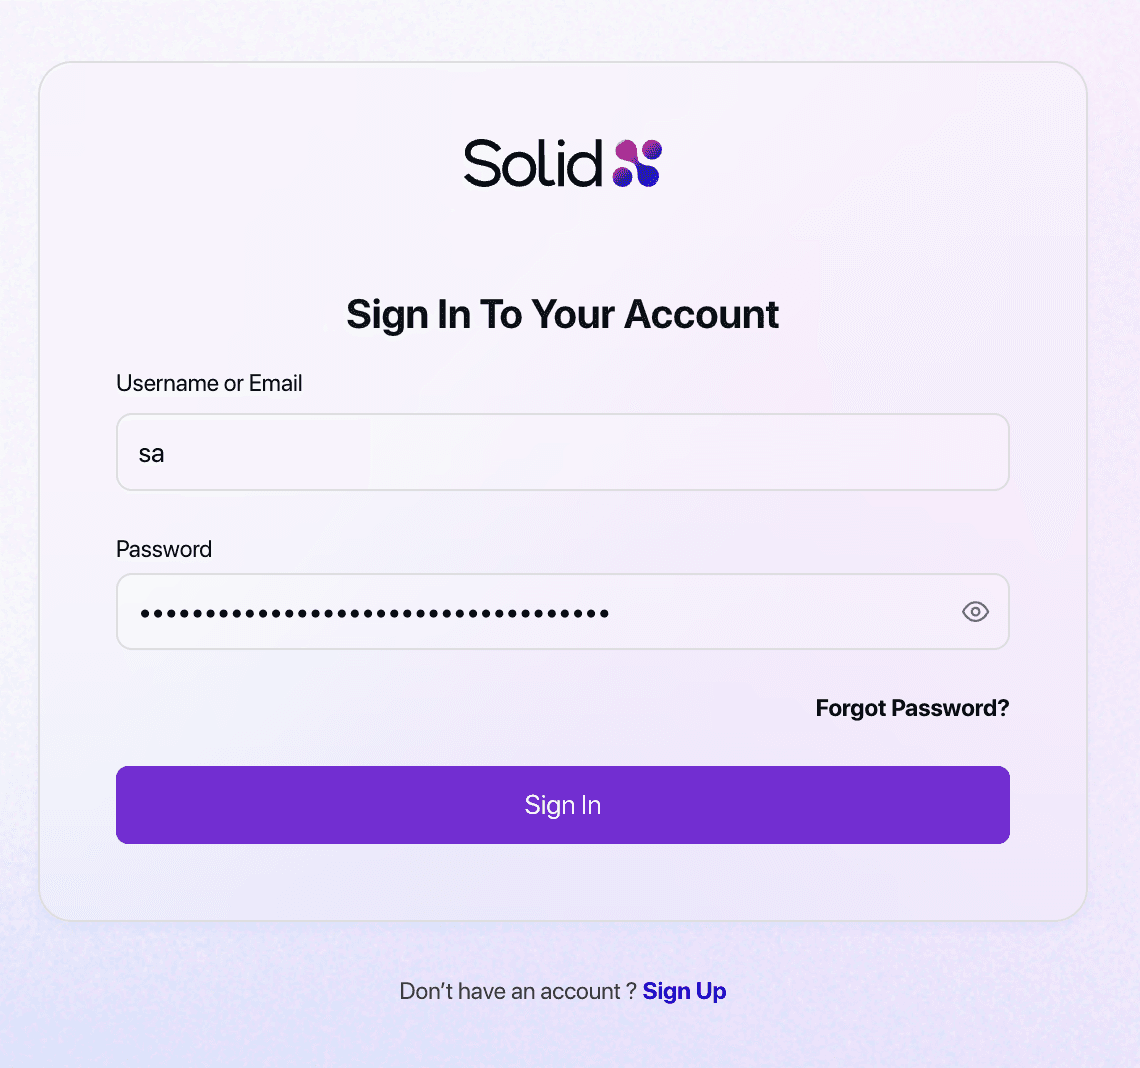 Screenshot showing the SolidX admin panel login screen
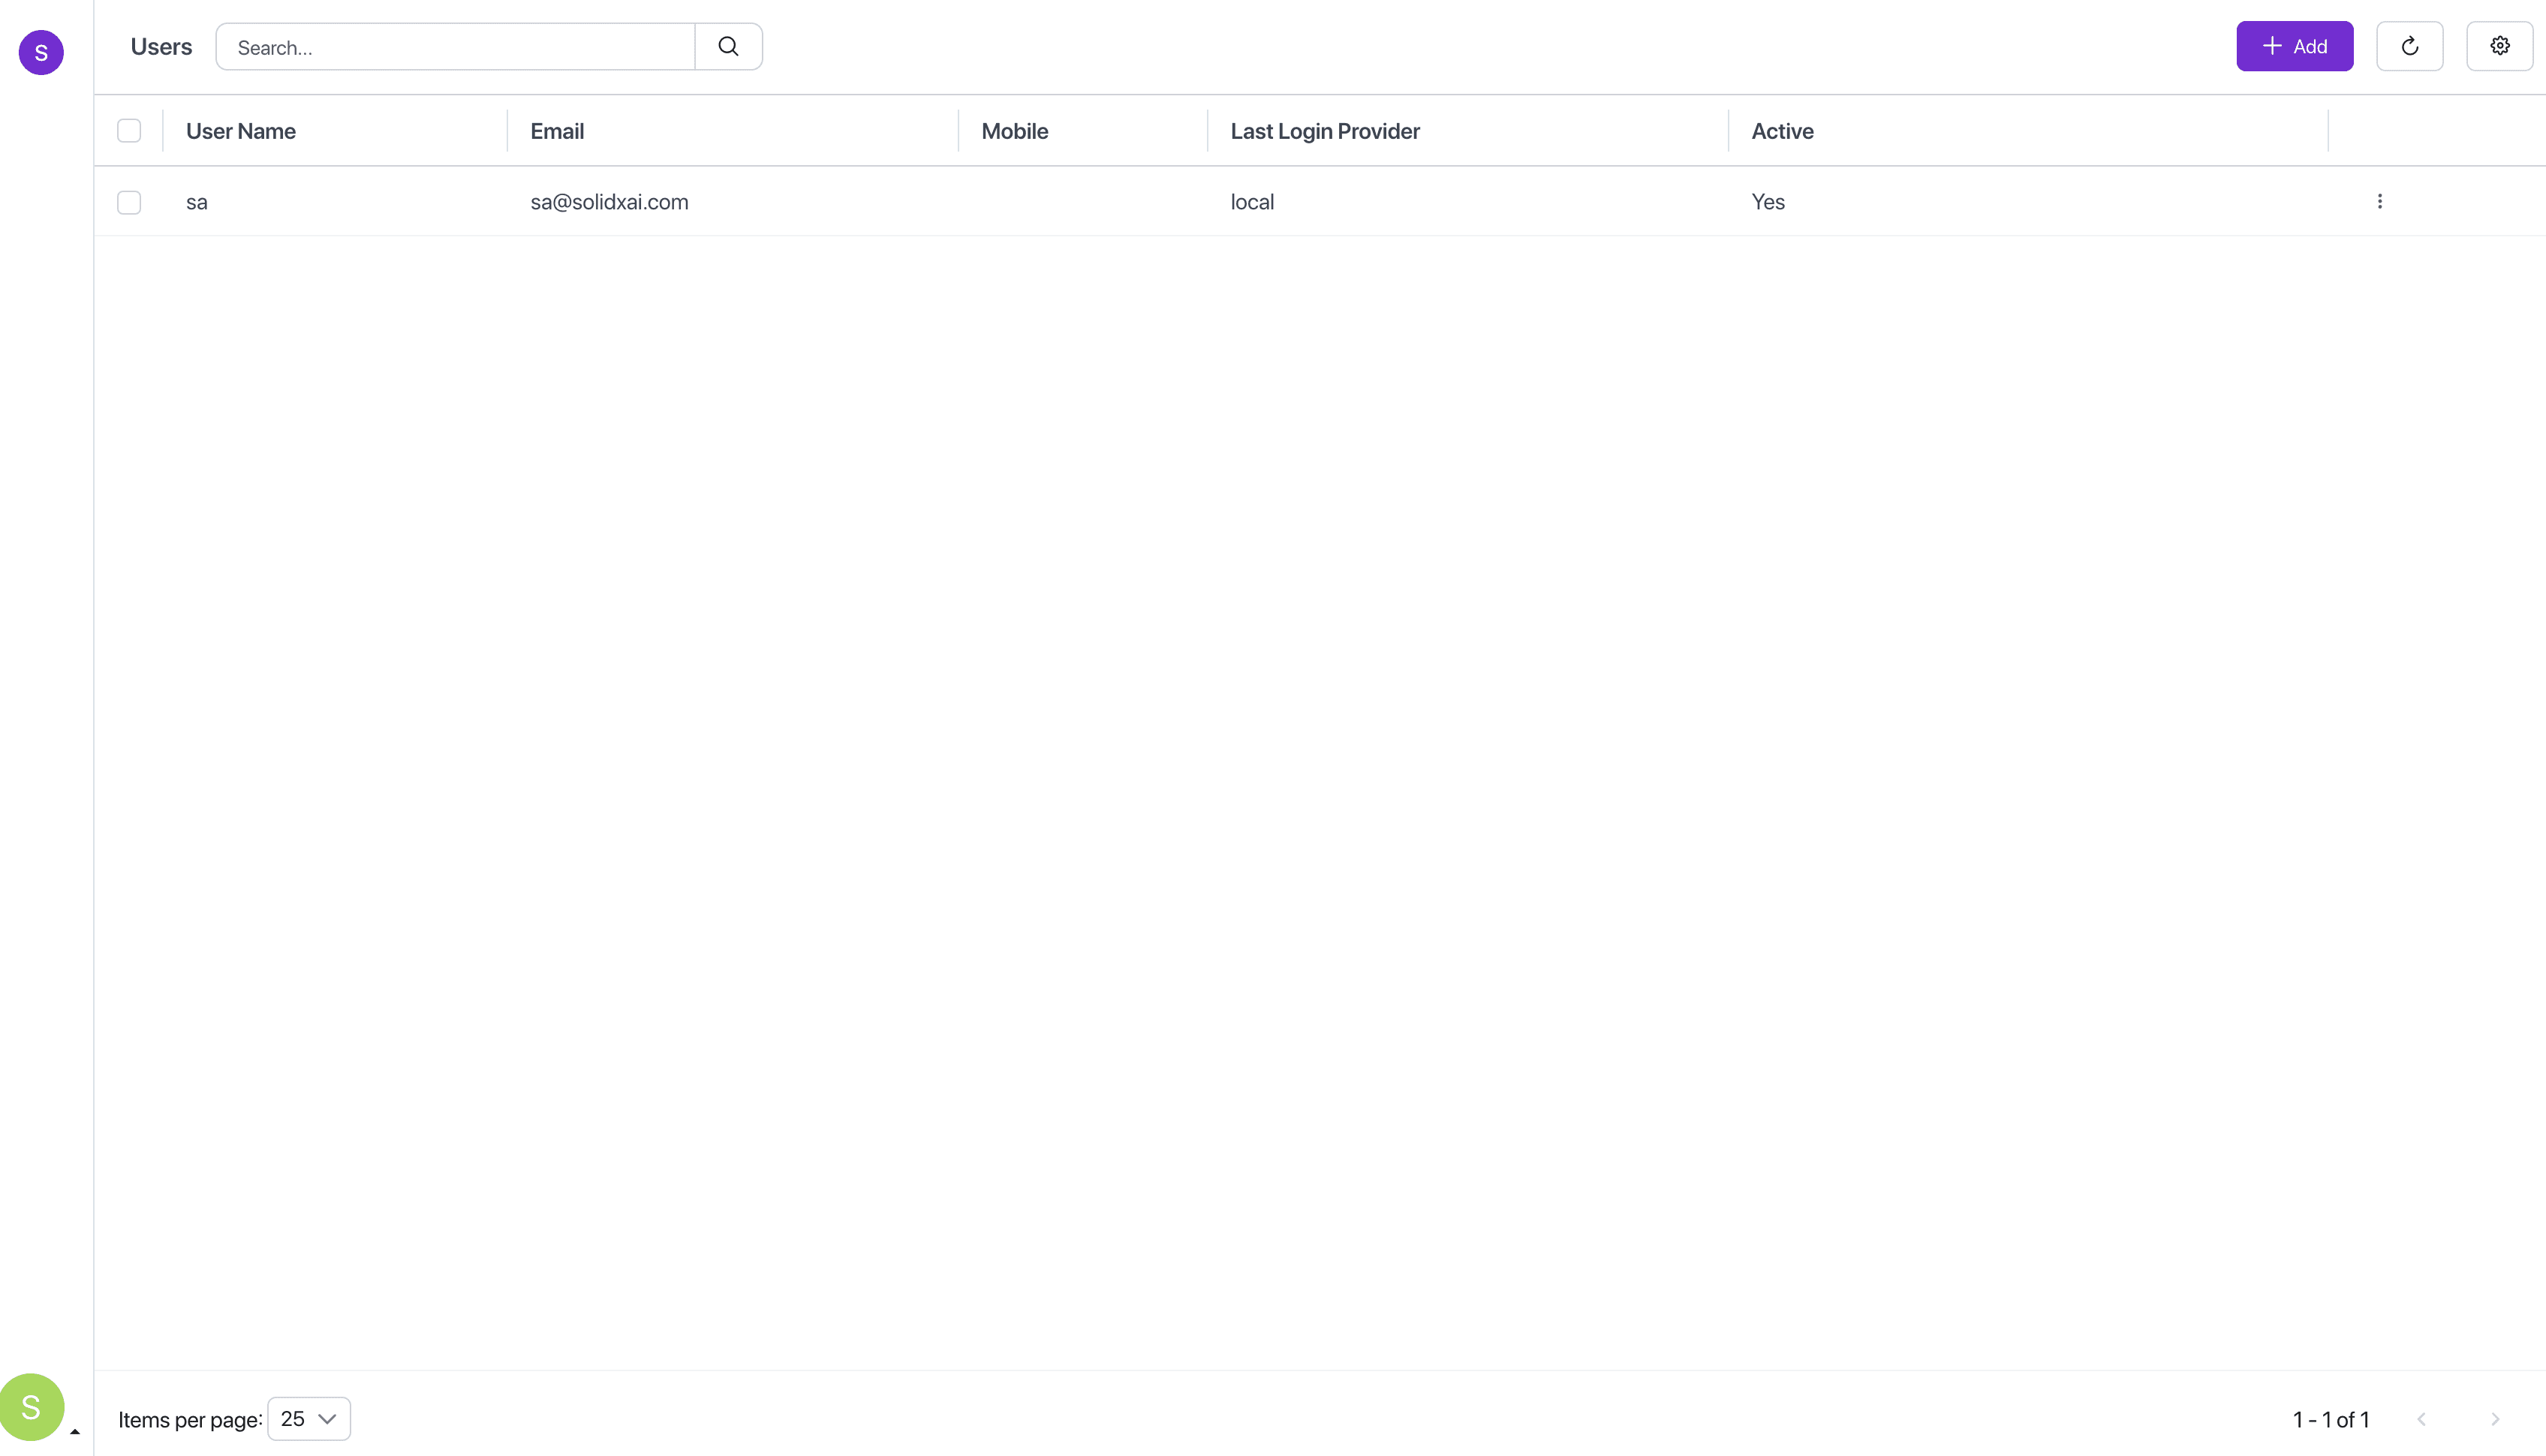 Screenshot showing the default landing page after successful login