
Create Solid App
In this step, we'll initialize a new SolidX project using the official starter CLI. This single command scaffolds a complete full-stack application, giving you a massive head start.
Create Solid App
Open your terminal and run the following command:
npx @solidstarters/create-solid-appWhen you run this command, the CLI will guide you through a series of prompts. Here's an example interaction:
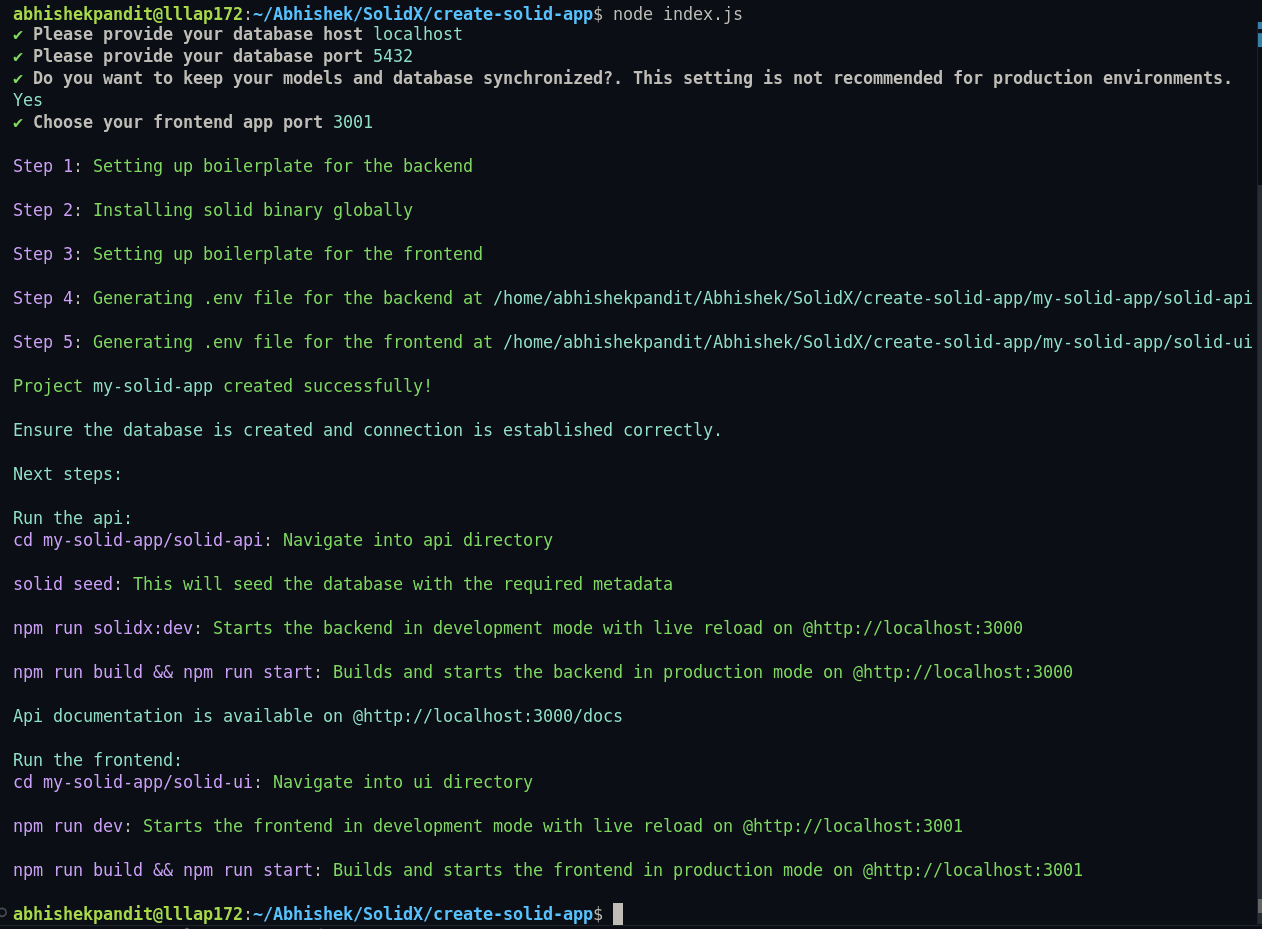
Configuration Options
These are different options that you can provide to customize application that is being bootstrapped.
| Prompt | Description |
|---|---|
| Project Name | Name of your SolidX project. This will be the folder name where your codebase is generated. e.g.; school-fees-portal |
| Backend API Port | The port number on which the backend API will run locally (e.g., 3000). |
| Database Client | The database type you want to use. Currently supports PostgreSQL and MySQL. |
| Database Username | Your local database username for connecting to the database. |
| Database Password | Password for the above database user. Entered securely in the terminal. |
| Database Name | Name of the database to be used for this project. Make sure that you have created this database on your local database server previously. |
| Database Host | Hostname of your database server. Typically localhost for local development. |
| Database Port | Port on which the database is running. PostgreSQL defaults to 5432. |
| Sync Models with Database | Allows auto-syncing database schema with model definitions. Not recommended for production, but useful during development. |
| Frontend App Port | The port on which the frontend app will run locally (e.g., 3001). |
Once you answer these prompts, the CLI performs the following setup steps:
- Sets up the backend server.
- Installs the Solid CLI binary globally
- Sets up the frontend UI.
- Generates .env files for both backend and frontend:
/school-fees-portal/solid-api/.env/school-fees-portal/solid-ui/.env
- Displays helpful next steps for running your app
Solid CLI binary is a set of shell commmands which allows running solidx functionality from command line.
Output
Once the CLI has finished, a new SolidX project is bootstrapped with both a backend and frontend scaffold.
Please make sure to run the
solid seedcommand below, as this is what will seed the local database with all the tables required for SolidX to run properly. After you runsolid seeda default admin user will be configured the password of which will be printed on the terminal. Please make a note of this as this will not appear again.
Backend
cd school-fees-portal/solid-api

# Seed the database with initial metadata
solid seed

# Start backend in development mode
npm run start:dev

# Optionally, run with debug mode
npm run start:debug

# Run in production mode
npm run start
SECURITY WARNING The
solid seedcommand will create a default admin user and print the password only once to the terminal. Save this password immediately in a secure location. You will need it to log in to the admin panel.
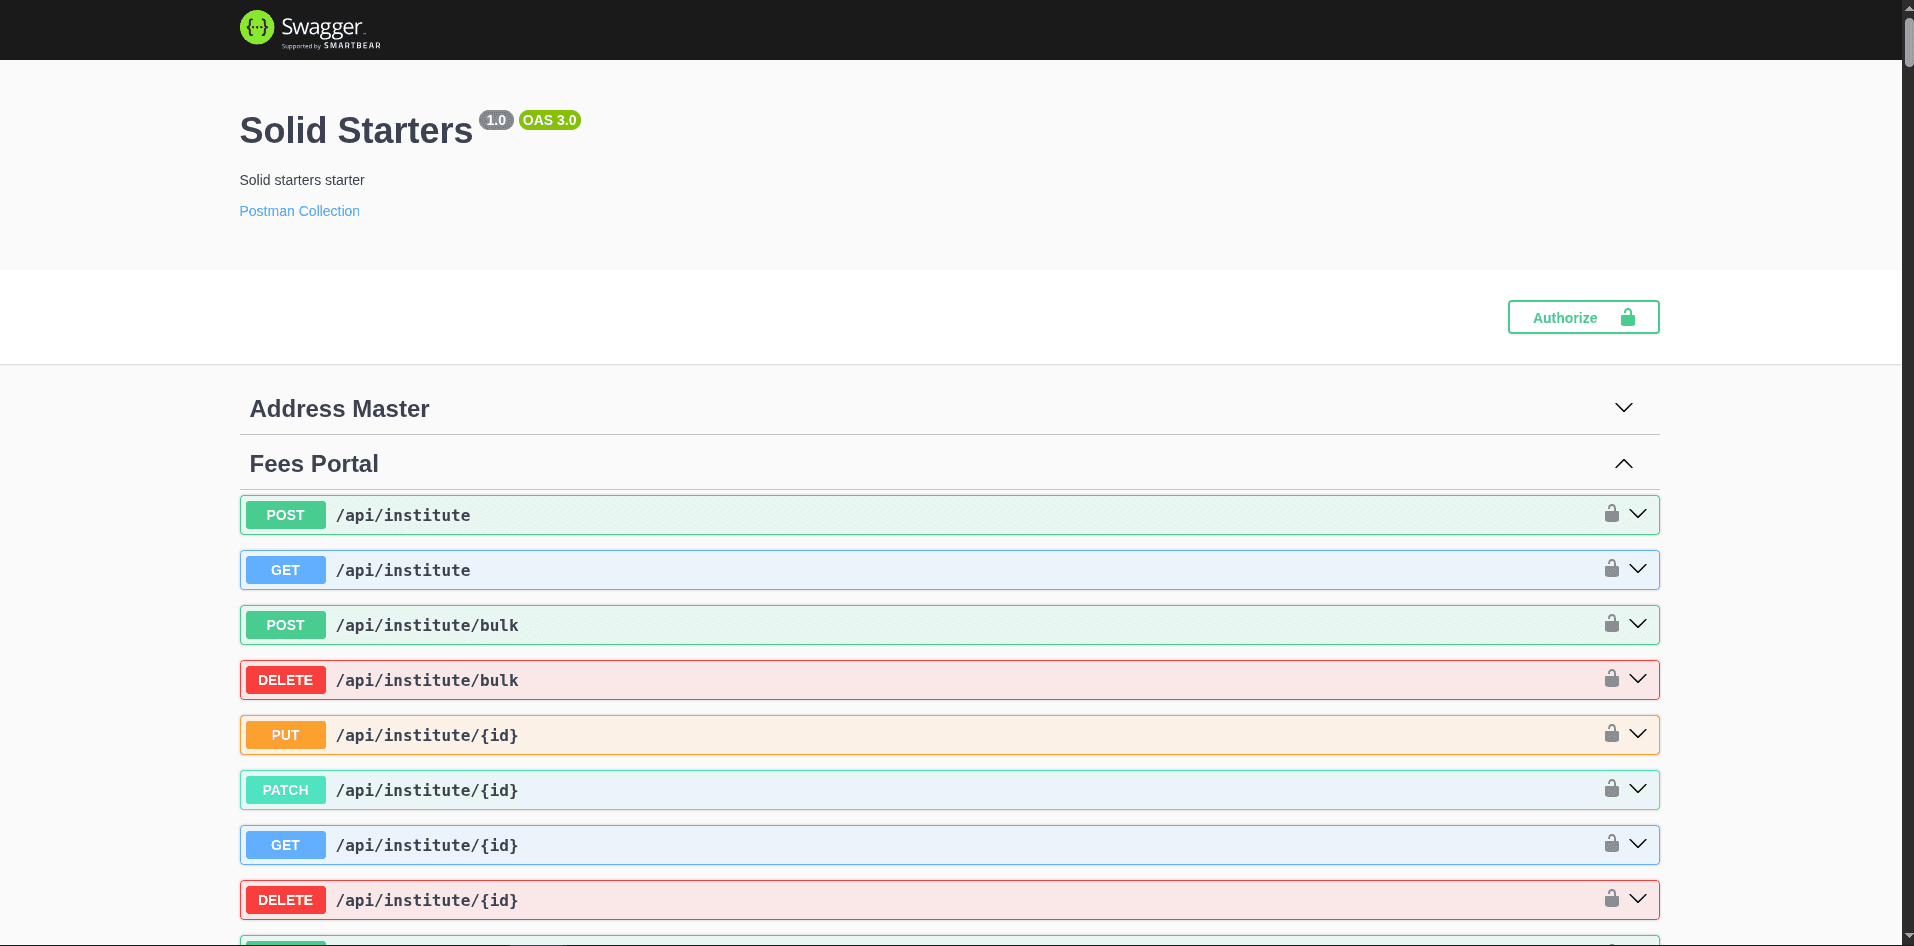
The SolidX backend allows you to generate all your REST API endpoints and comes pre-configured with Swagger documentation which you can access at http://localhost:3000/docs.
Swagger Docs:
The interactive API documentation, powered by Swagger UI, allows you to explore and test the generated REST API endpoints directly from your browser.
Frontend
cd school-fees-portal/solid-ui

# Start the frontend UI
npm run dev
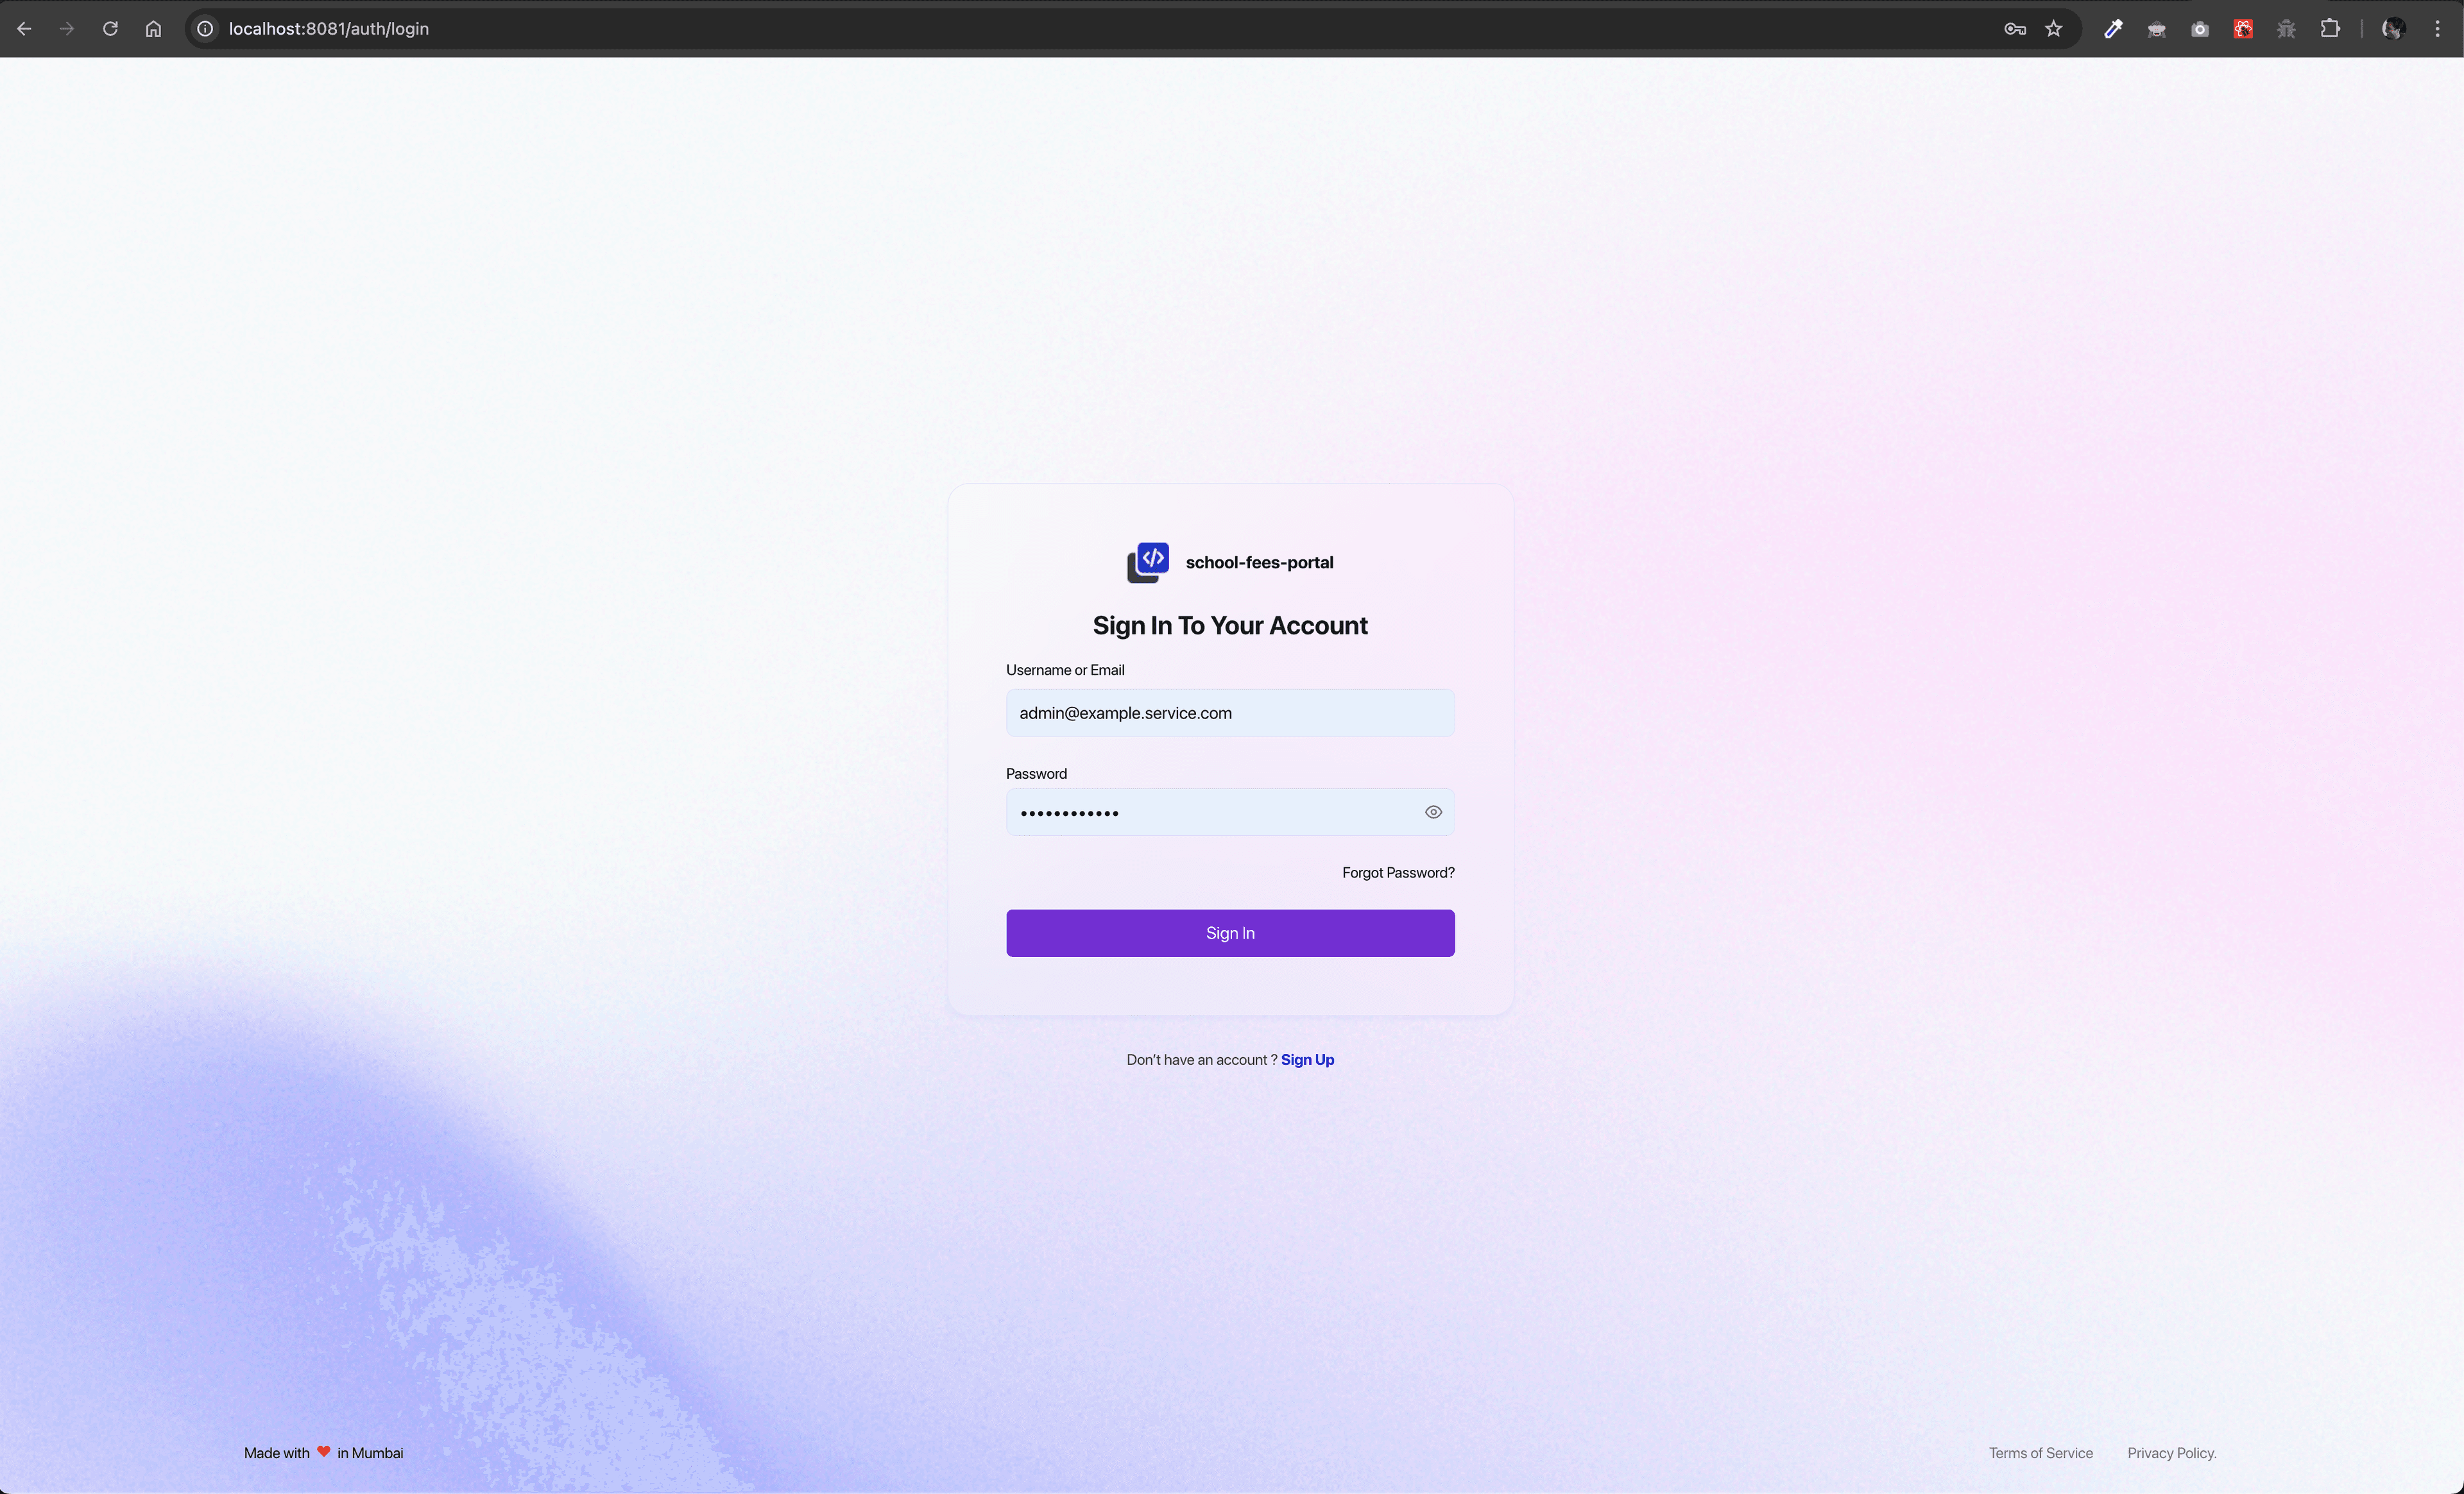
The frontend application will be running at http://localhost:3001.
Default Admin Login Page:
Generated Code
At this point, you will have a folder named after your project (e.g., school-fees-portal) in your working directory. You can open this folder in your code editor.
Inside this project folder, you will find two main subdirectories:
solid-api: Contains the entire backend application.solid-ui: Contains the entire frontend application.
SolidX backend uses NestJS as its core framework.
SolidX frontend uses NextJS as its core UI framework.
Each of these folders has its own .env file, pre-filled with the configuration you provided during the setup process.
What You Get Out-of-the-Box
This single command generates a feature-rich starting point. Here’s a look at what's included:
- Full-Stack Application: A complete project with a NestJS backend (
solid-api) and a Next.js frontend (solid-ui). - Authentication & Users: A pre-built module for user registration, JWT-based login, and password management.
- Auto-Generated Admin UI: A fully functional admin panel to manage your data as soon as you define your models.
- Auto-Generated REST API: Instant RESTful endpoints for all your data models, complete with interactive Swagger documentation.
- Database Seeding: A
solid seedcommand to initialize your database with necessary system data and a default admin user. - Configured Environments: Ready-to-use
.envfiles for easy management of ports, database credentials, and other settings. - Extensible Architecture: A clean, modular structure that's easy to extend with your own custom business logic.